New PRPS Student Registrations (PT 2): Delivery and ASN Student Look Ups
New PRPS Student Registrations (PT 2): Delivery and ASN Student Look Ups
This guide demonstrates how to process new student registrations within PowerSchool Enrollment. It covers essential administrative tasks including record delivery, student matching, and updating provincial student numbers to ensure accurate data management. AND, there is even a tip for working around a common Compliance Screen issue when trying to create a new ASN for a student.
1. Navigate to your New PRPS Student Registration Form 26-27 in PS Enrollment. These steps assume you have already followed all the previous instructions to have your new students ready to deliver.
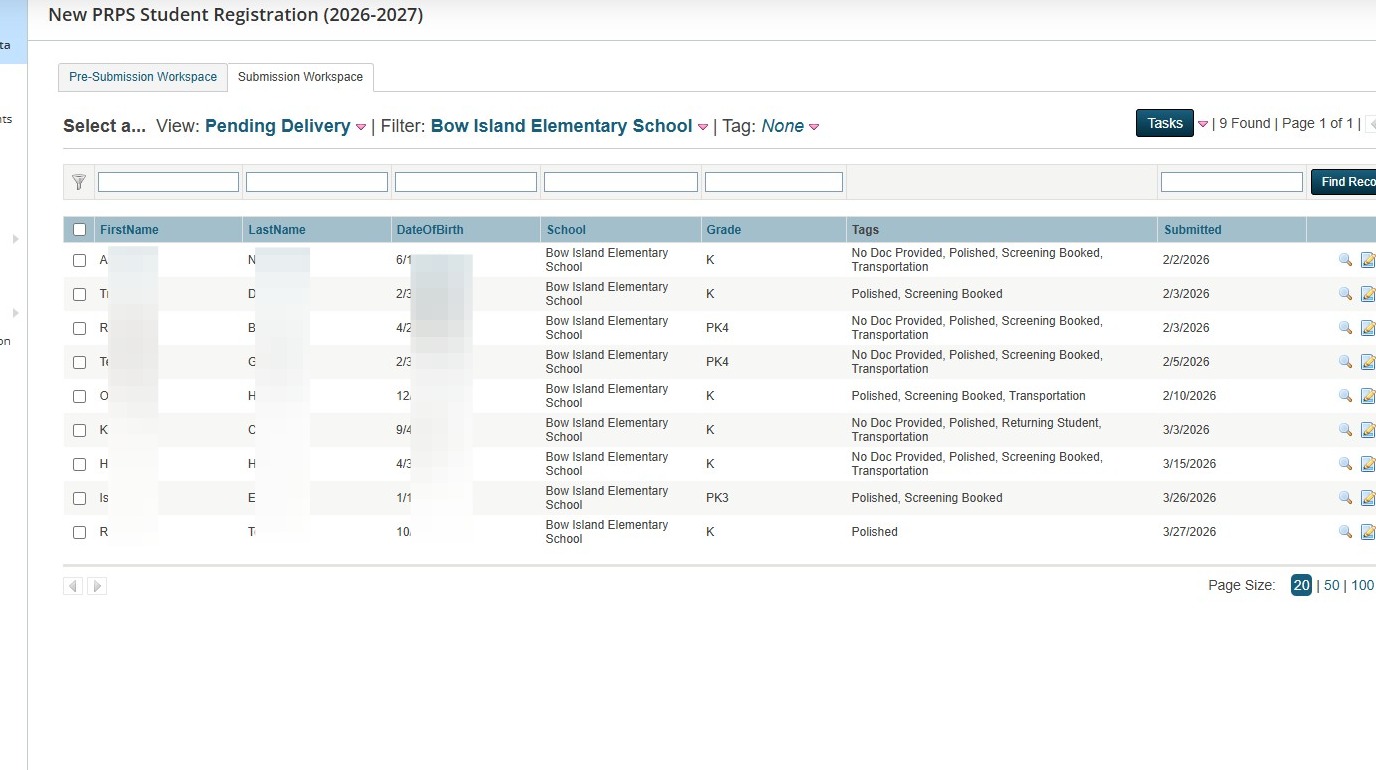
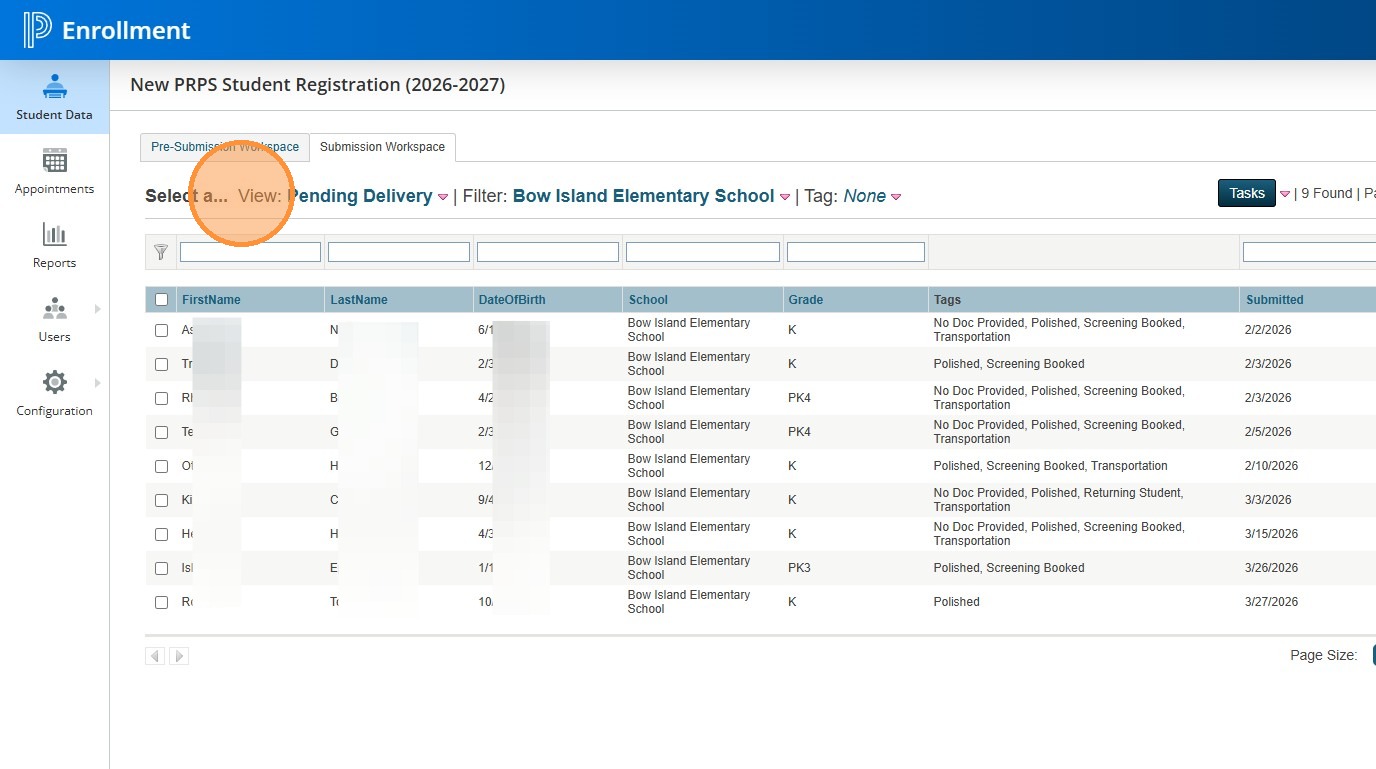
2. Go to the Pending Delivery view.
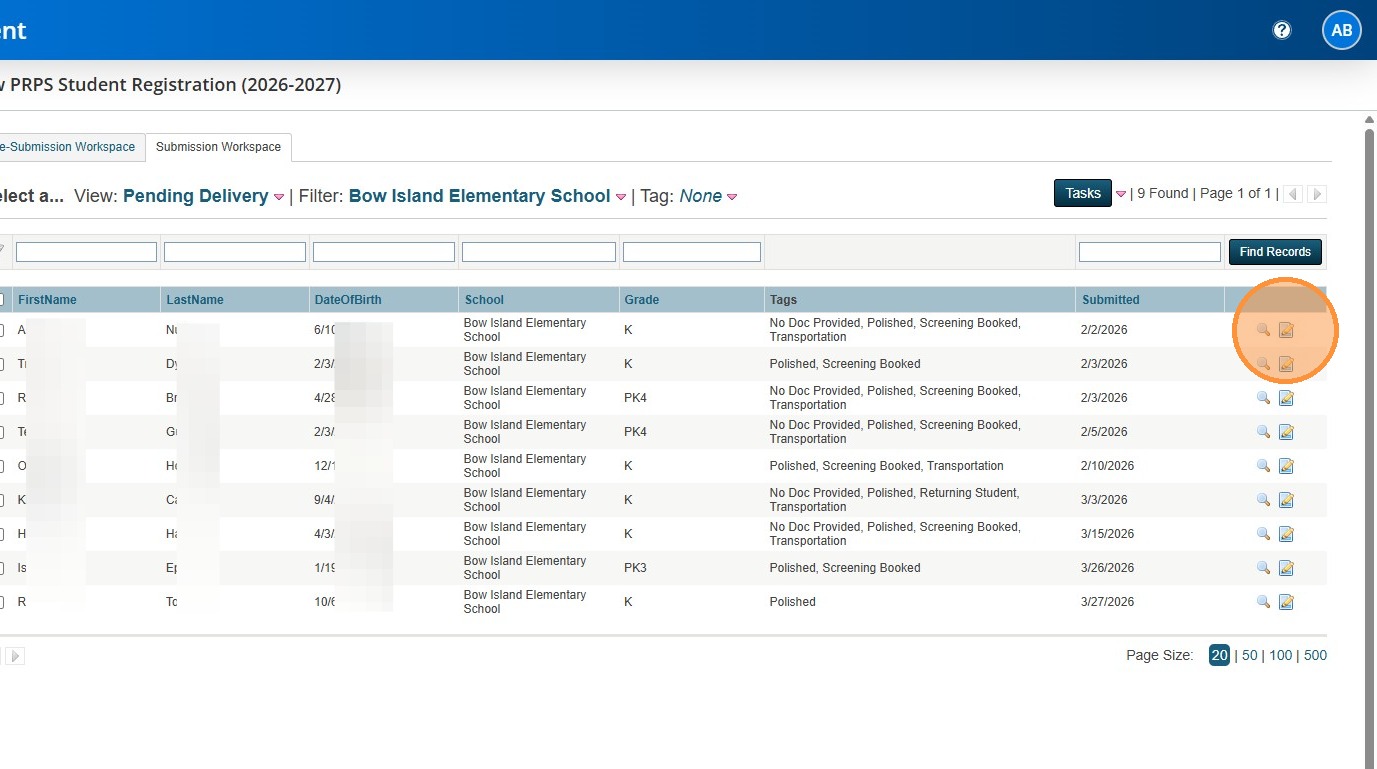
3. Click on the note and pencil icon beside the student you want to deliver.
4. You will notice that we had a new field added to the form. This dropdown will allow you to pick the entry code for the student and have it deliver back to the SIS.
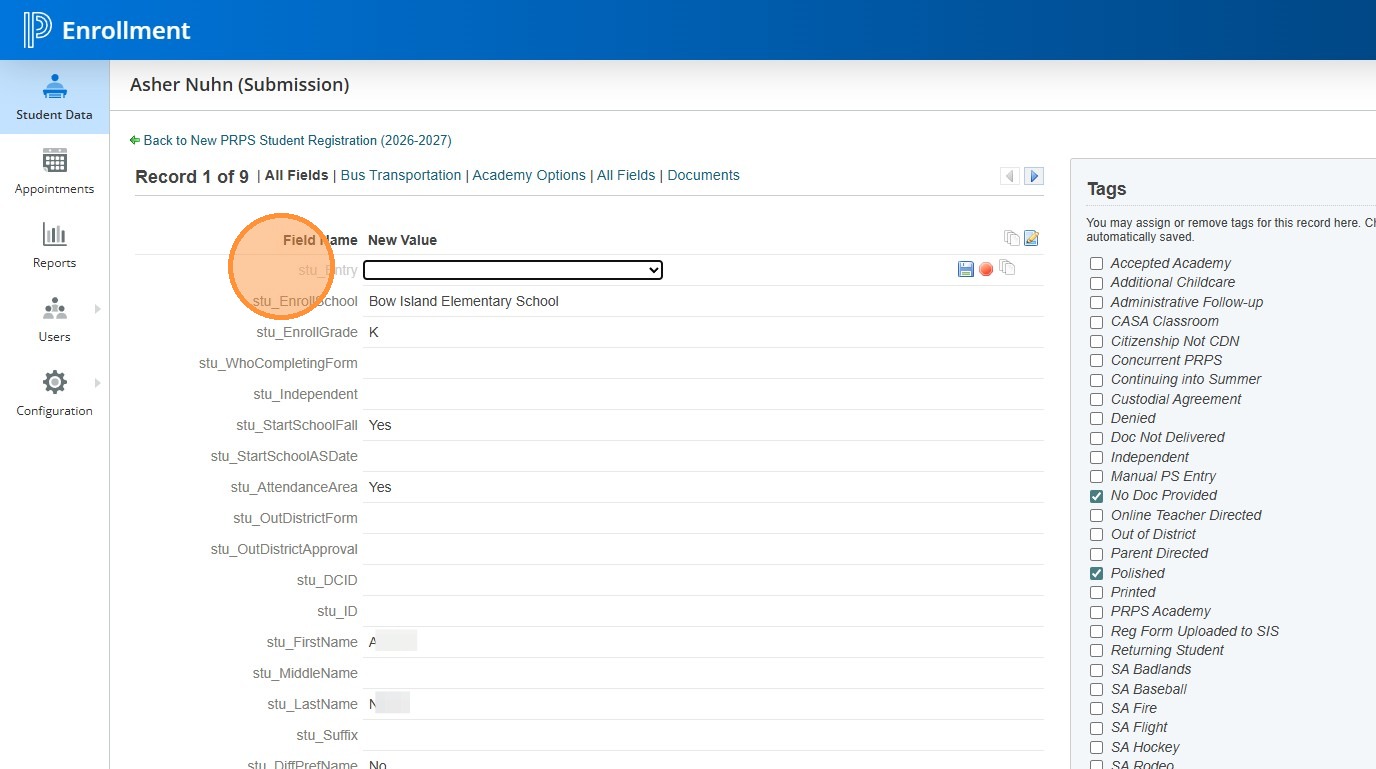
5. Choose the appropriate enrol code from the dropdown menu.
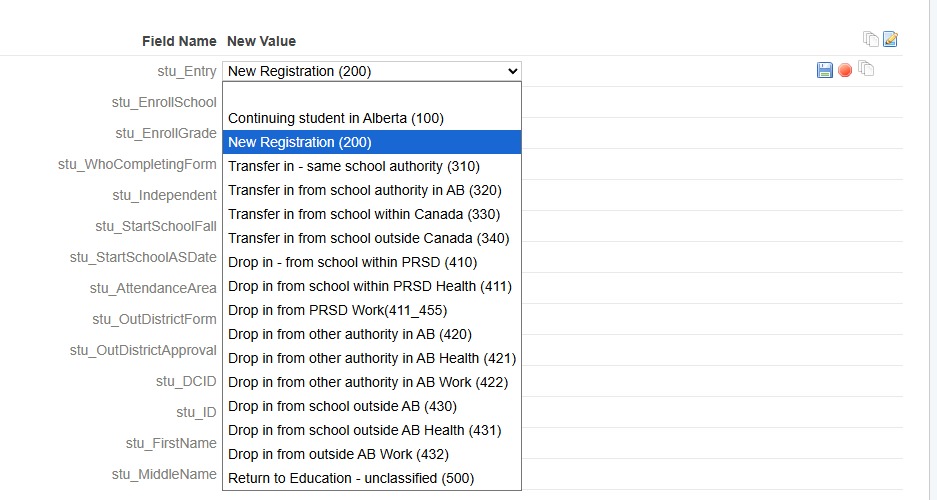
6. Click "Back to New PRPS Student Registration (2026-2027)"
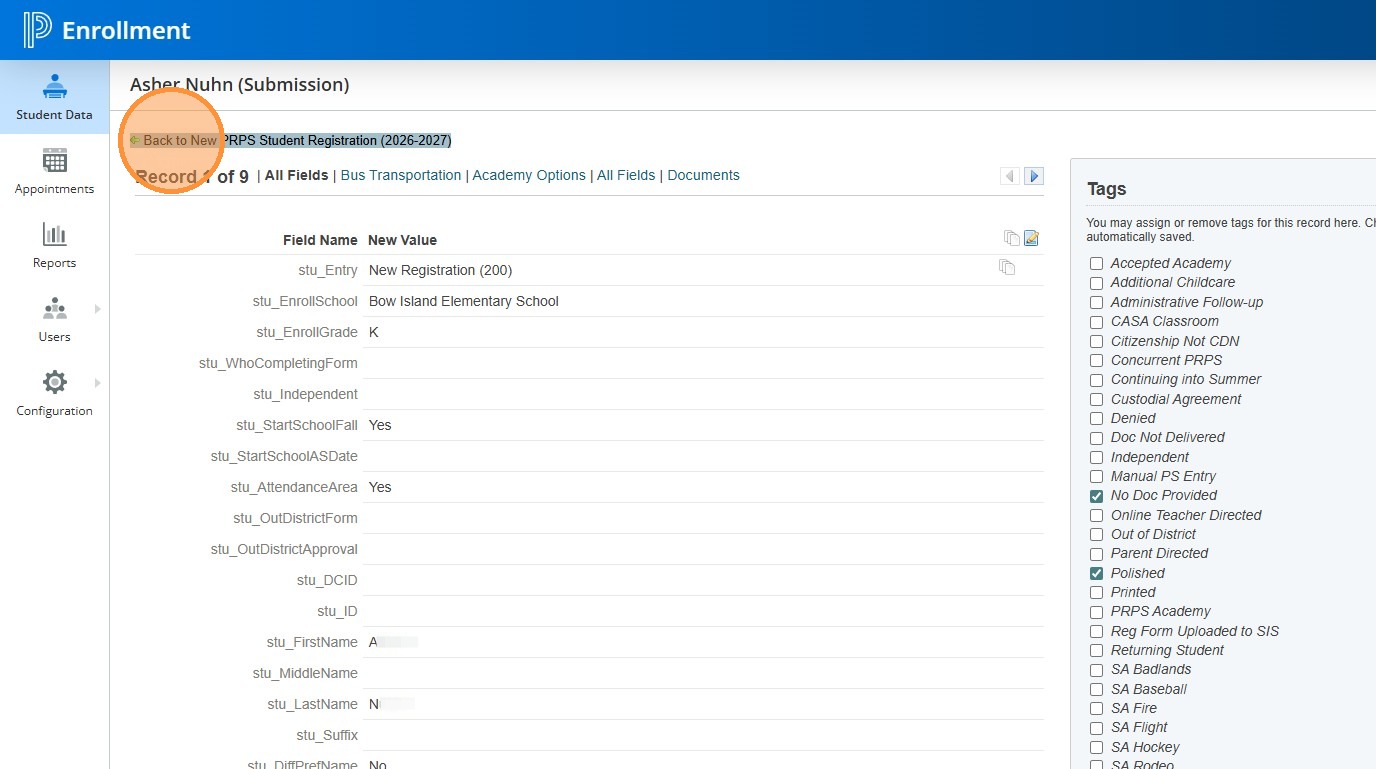
7. You are now ready to deliver your student. Choose the student you want to deliver.
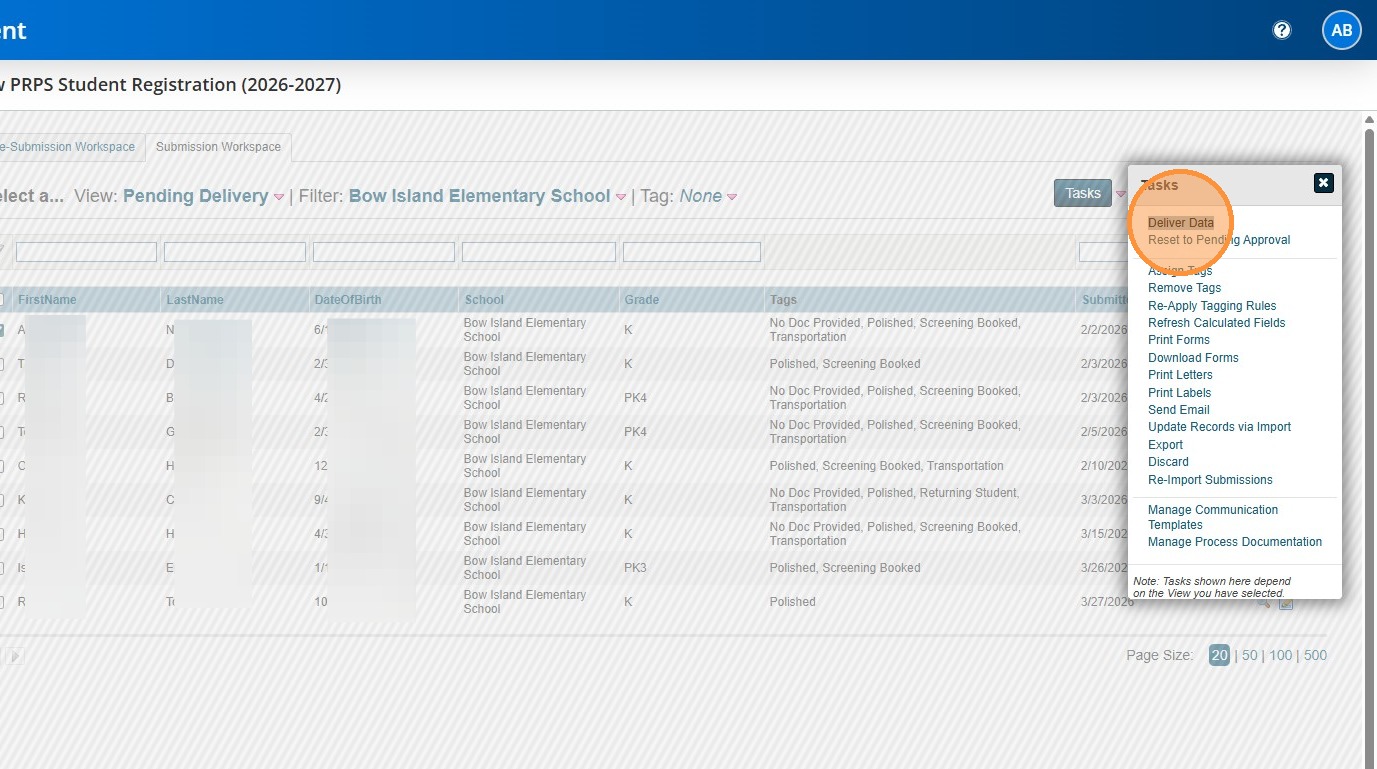
8. Click on Tasks, Deliver Data.
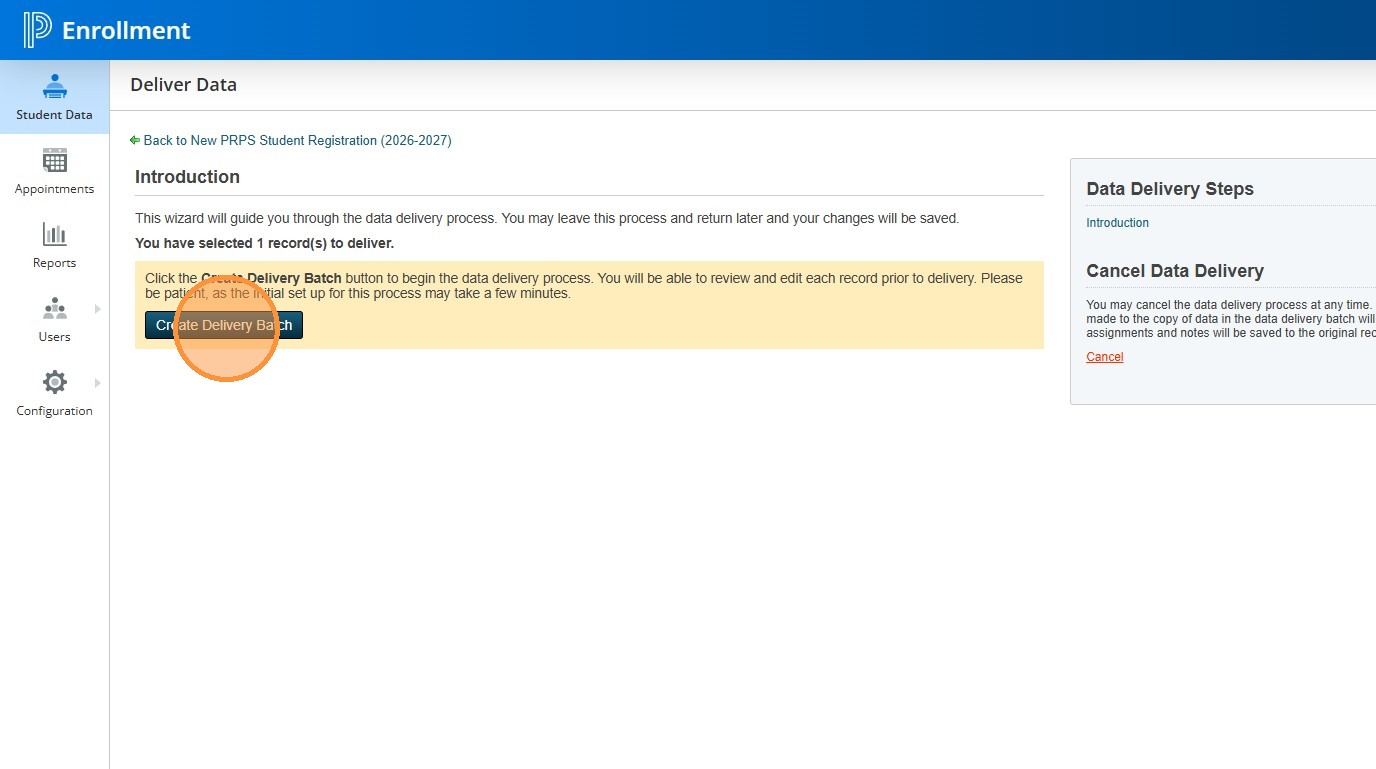
9. Create your deliver batch.
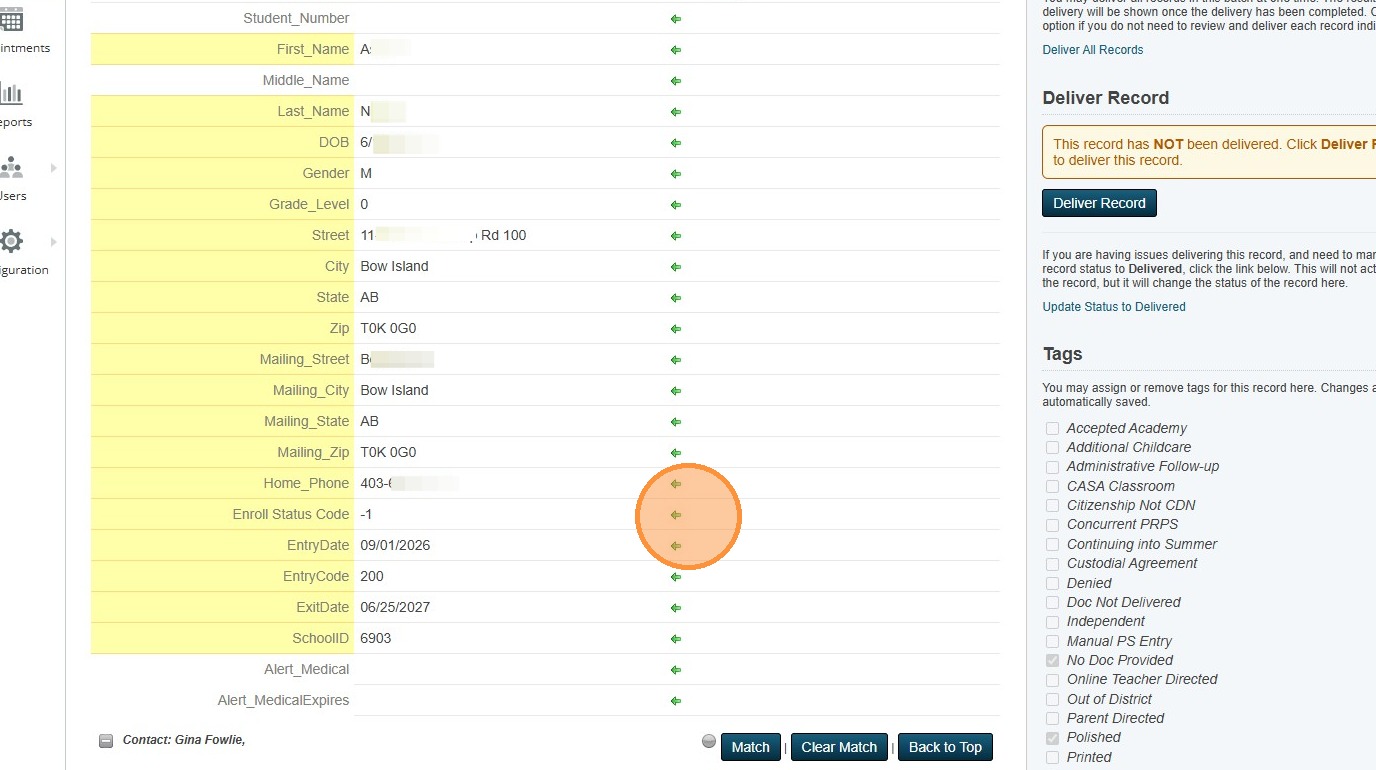
10. Once your batch opens, do a quick review to make sure everything looks good. This will also be where you are going to watch for matches of students and contacts.
- As this is a new student AND we have not done the rollover into the new school year, you will want to make sure the Enrol Status Code is -1. It should be that way by default. After the July rollover, these statuses can be set to 0 or -1. The start dates just need to be correct. (-1 means preregistered and 0 being active in SIS (but not PASI until start date))
- Your Entry and Exit dates are set for the 2026-2027 year by default.
- You Entry Code has been entered for you already from the last step.
Note: After we walk through the delivery of this student, I will show you a couple of other troubleshooting tips that you will want to watch for or navigate. Those are near the end of this tutorial.
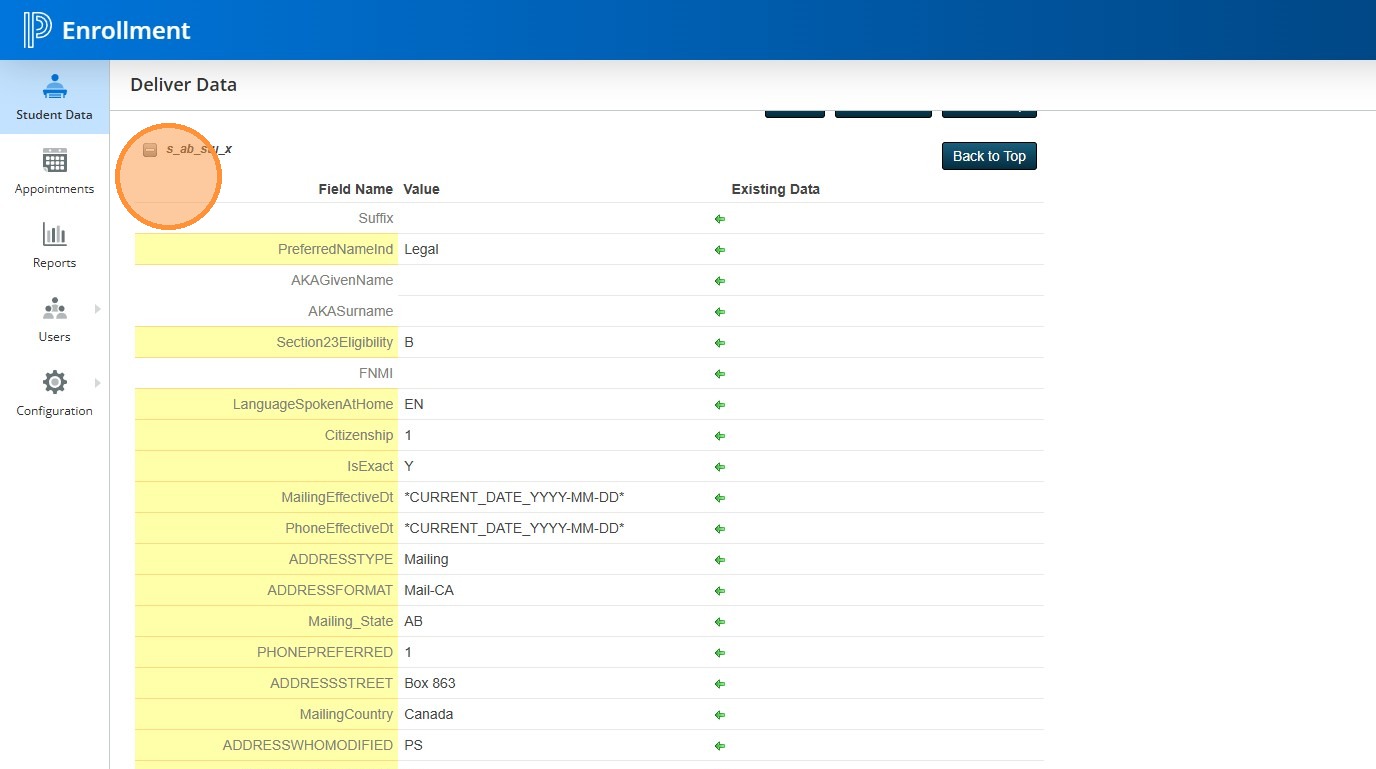
11. There's nothing else to do, but it is good practice just to review all the sections in the form to make sure everything looks good.
Before you deliver, check to see if the student is in the PRPS database. If they are, you can add their student number before you Deliver the data.
12. Tip 1: Here is one of the tips you can do to connect your student data if they were a student previously.
Go to SIS.
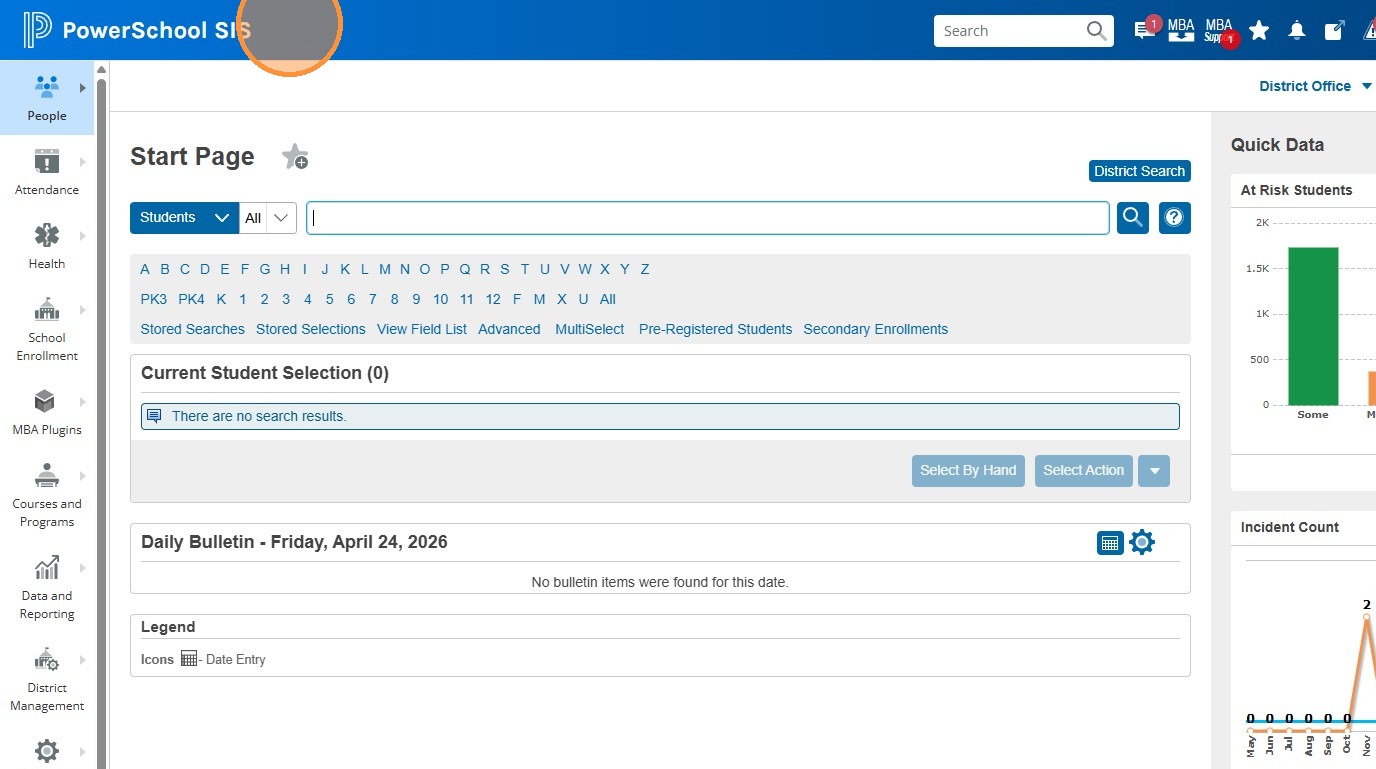
13. Click on District Search
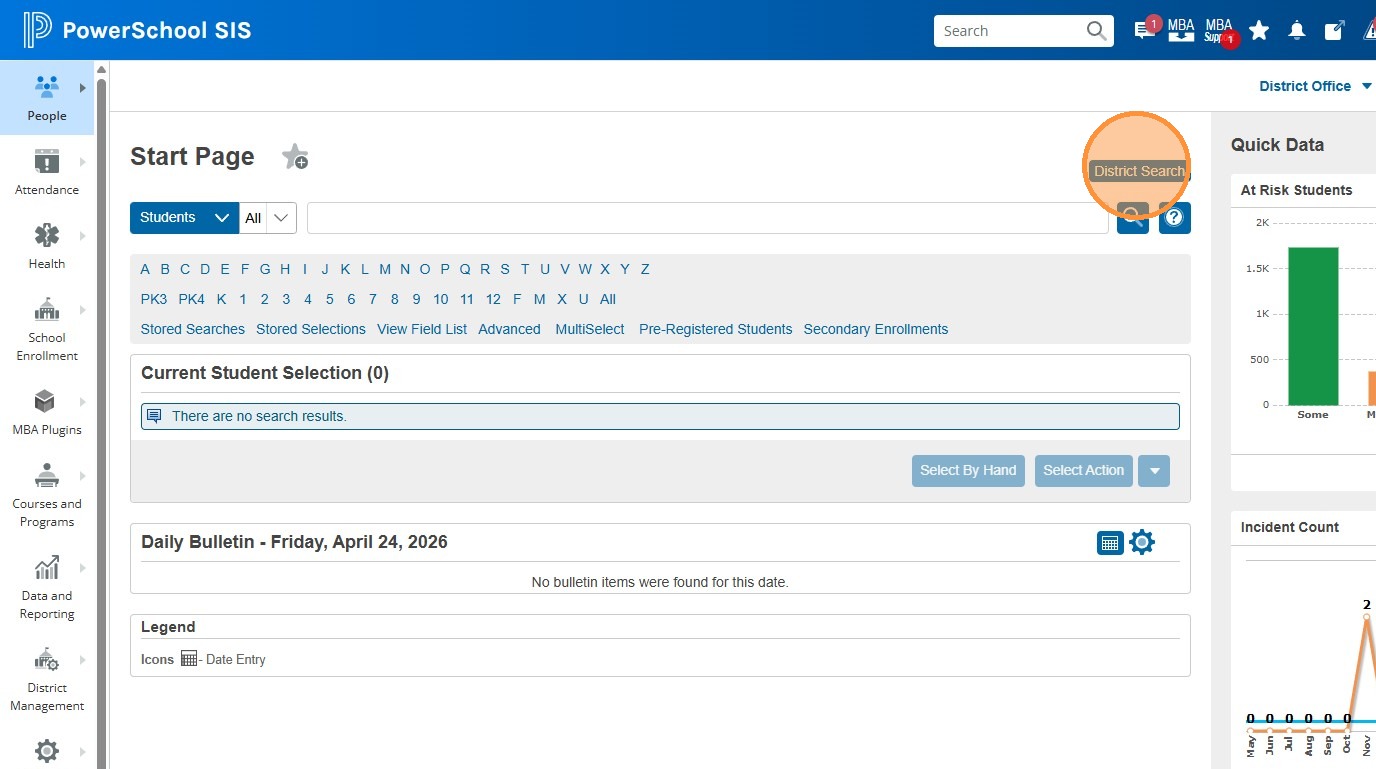
14. Enter the student's last name, OR Date of Birth (not both) and click Search
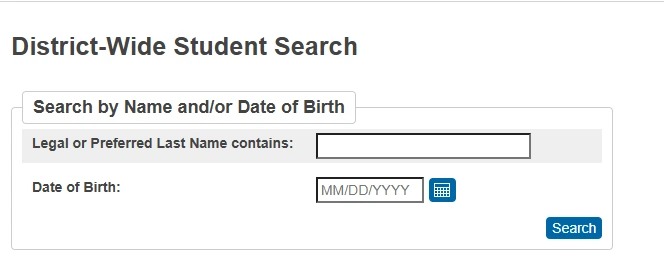
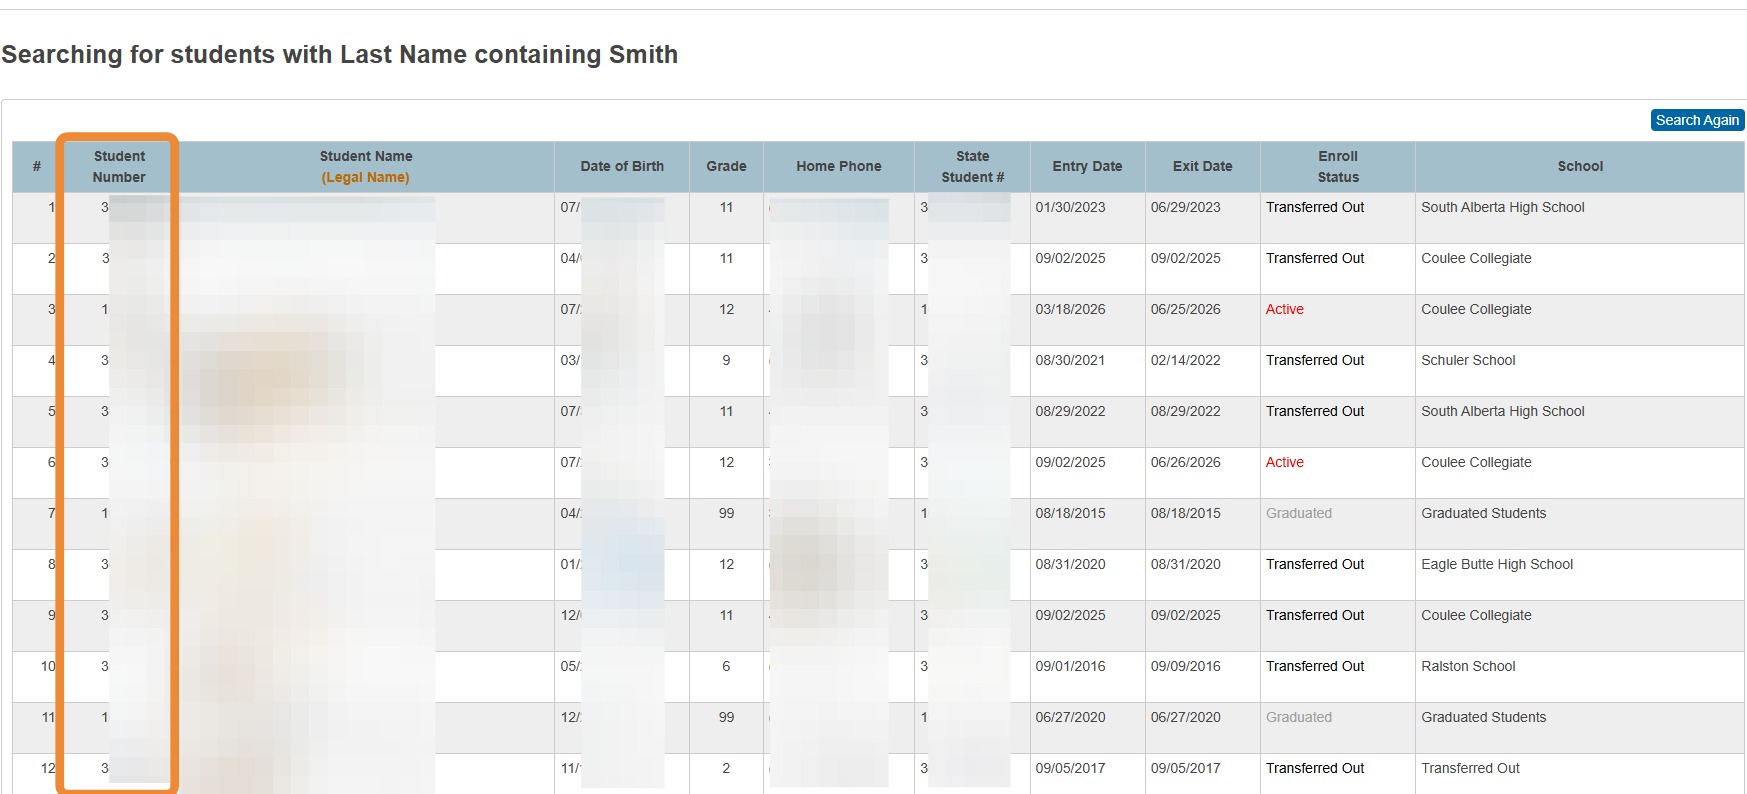
15. If the student does show up as a previous (or even current if the parent filled out the wrong form) PRPS student, you are able to copy the student number from this PS SIS screen and use it in the delivery.
Copy the student number if you found the same student.
16. Click back to your PS Enrollment delivery page which is still open.
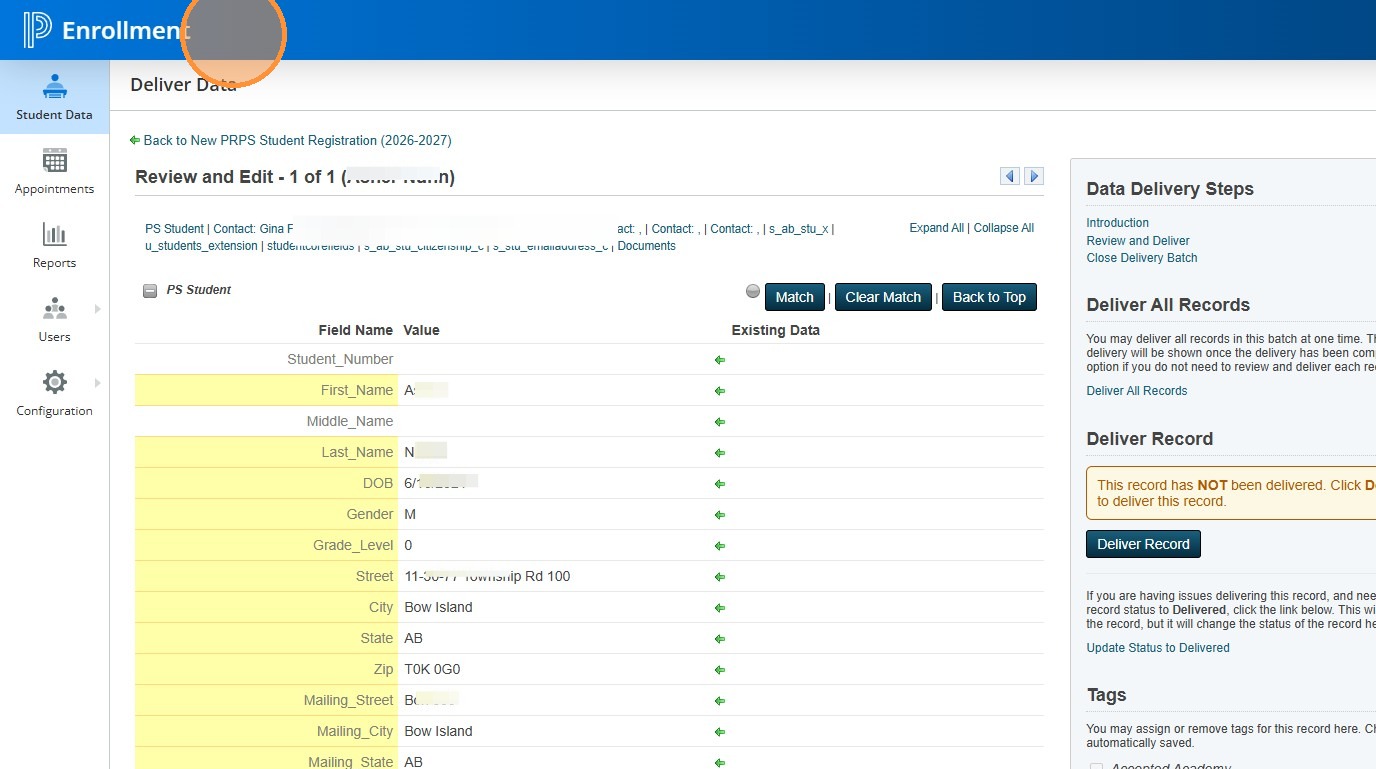
17. At the very top of the form you can paste in the ASN.
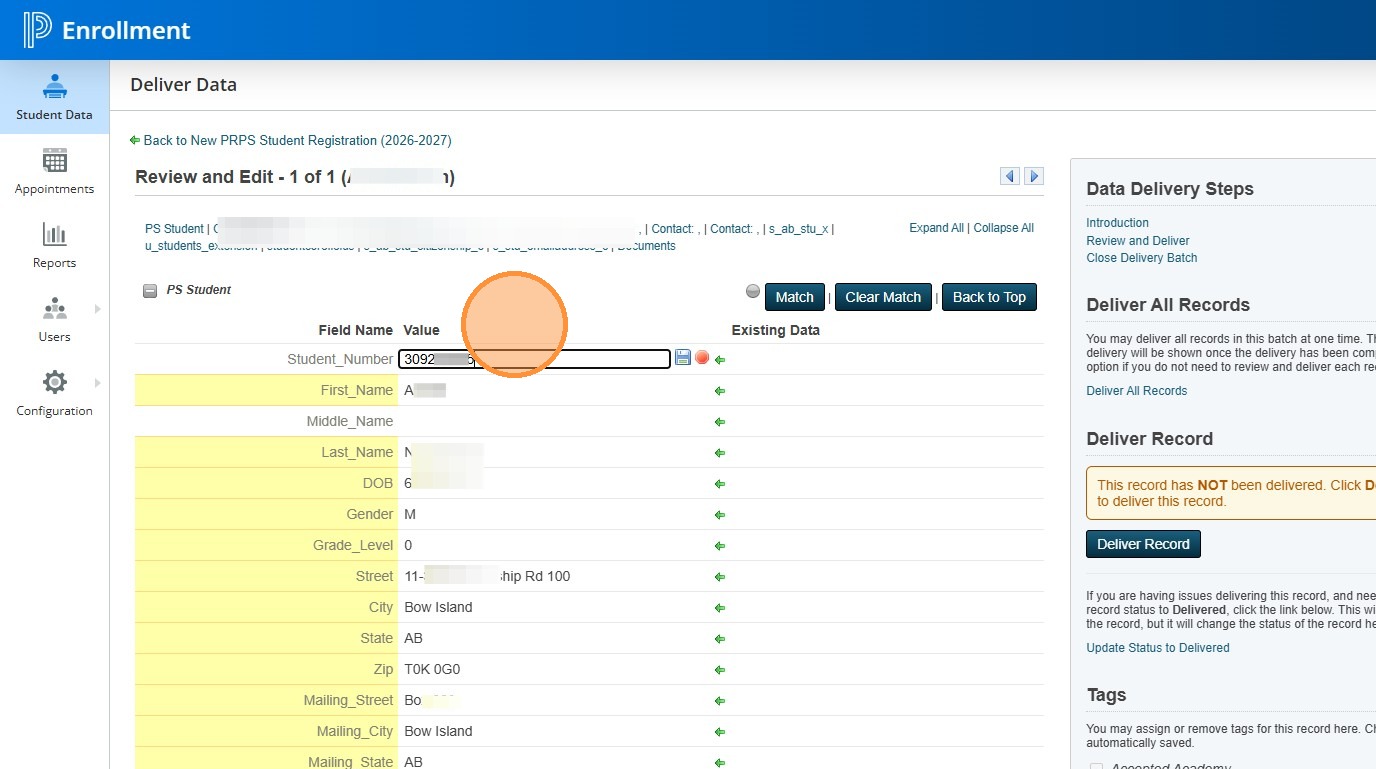
18. Click "Match"
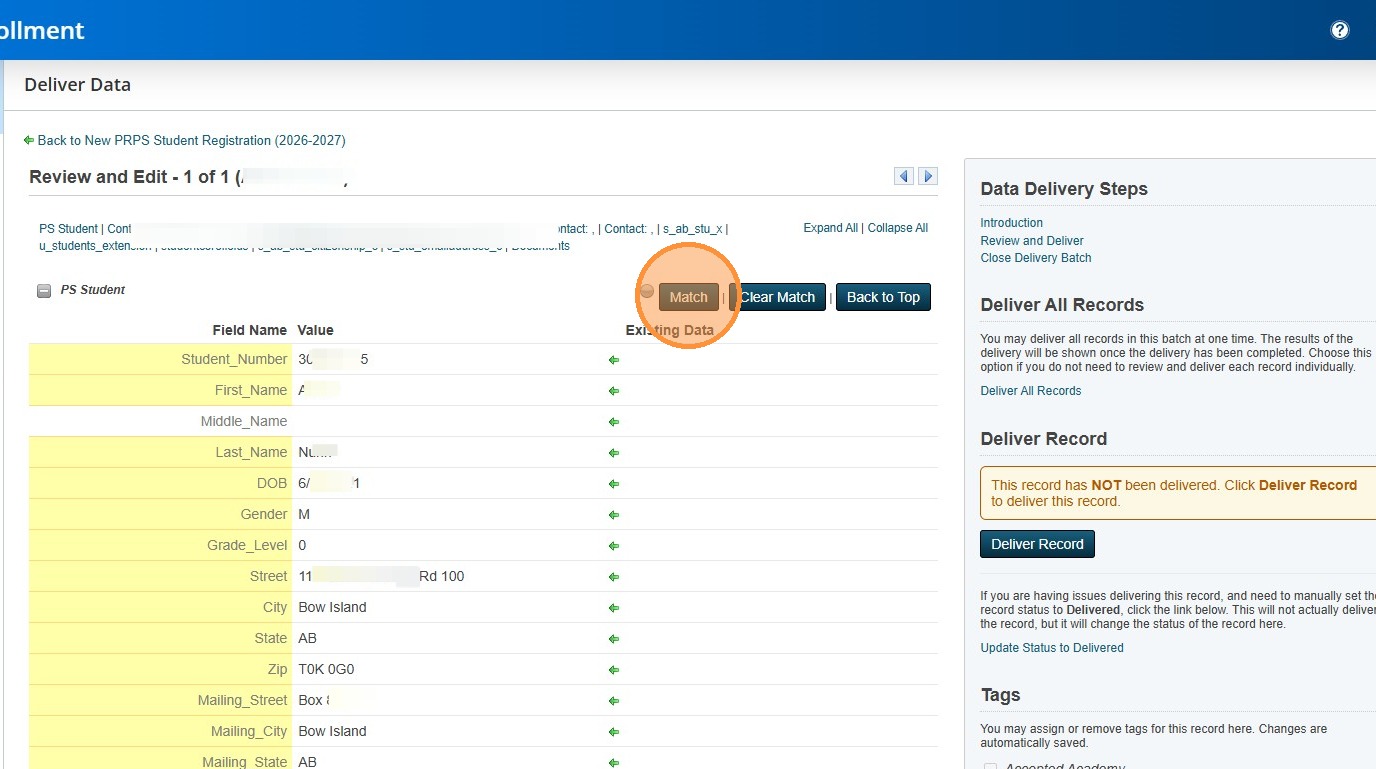
19. The student should appear if you found them in the SIS. Click "Select"
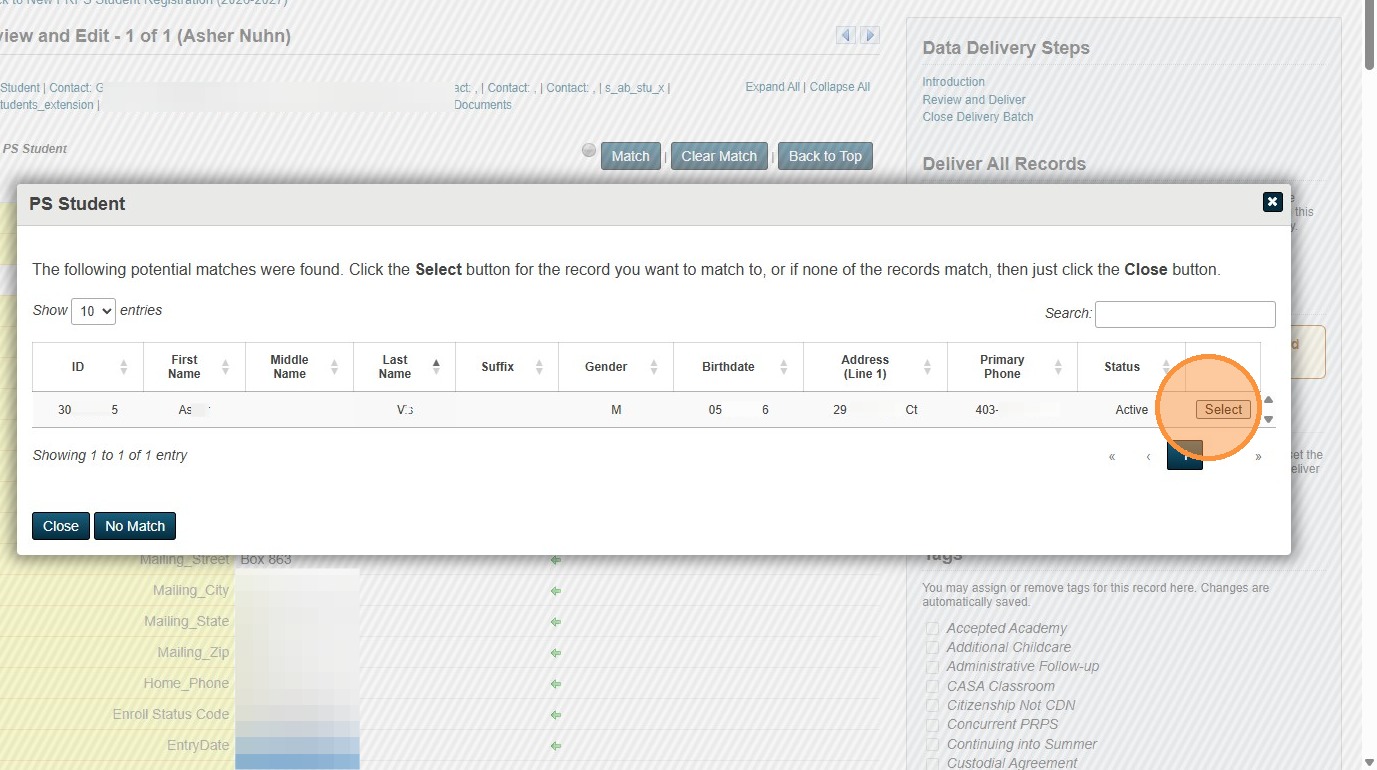
20. The match will bring up all the former inforamtion on the student and connect their contacts. This will prevent you from making duplicates in the system.
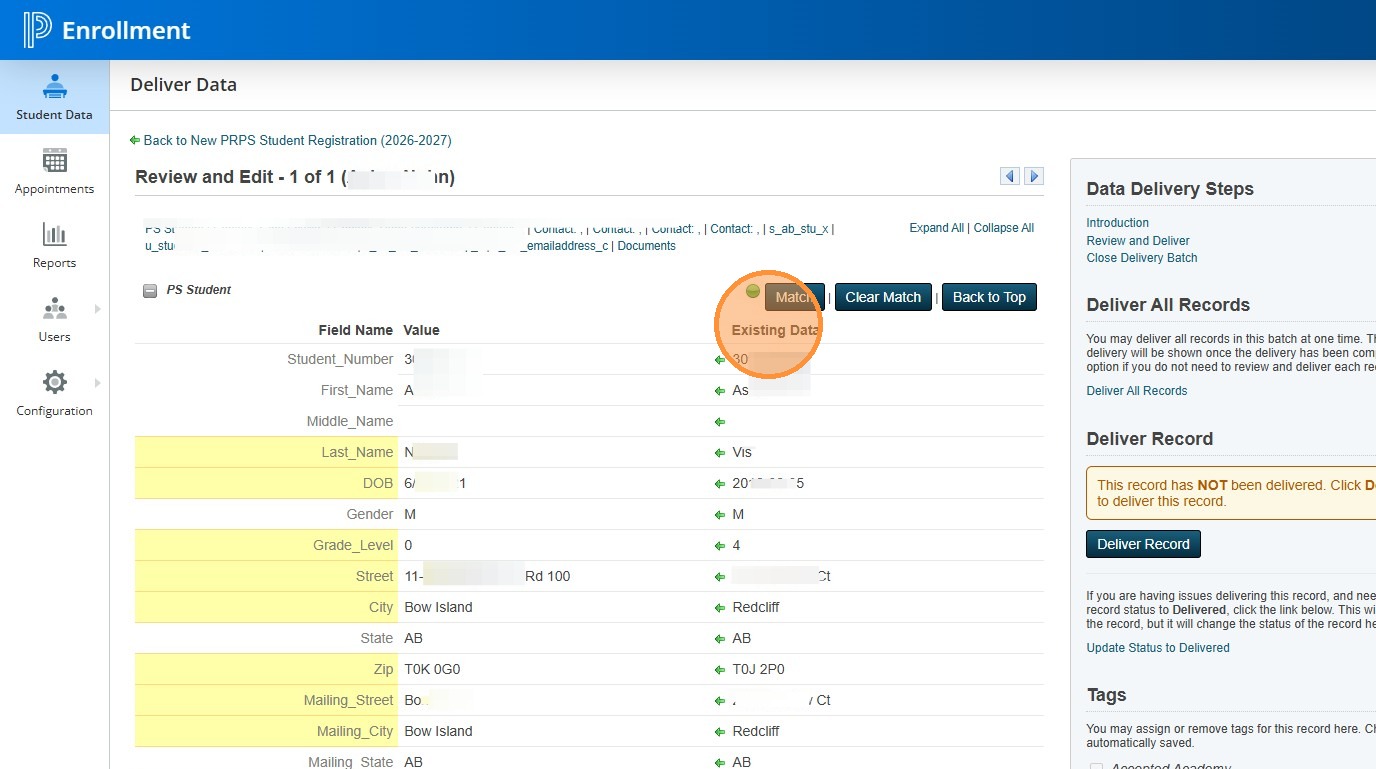
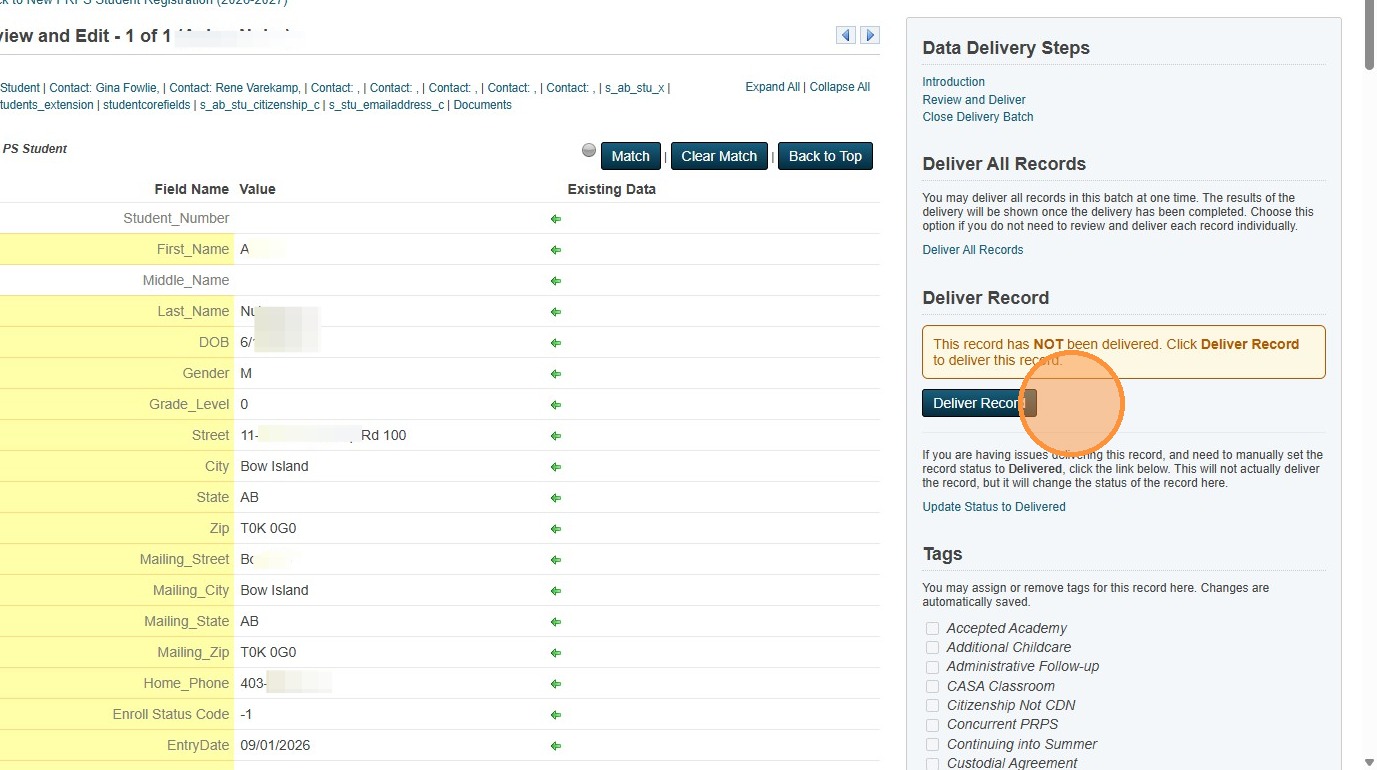
21. Going back to our student we are about to deliver, this one didn't have a match in SIS and is new to PRPS. You would leave the student number blank.
Click Deliver Record.
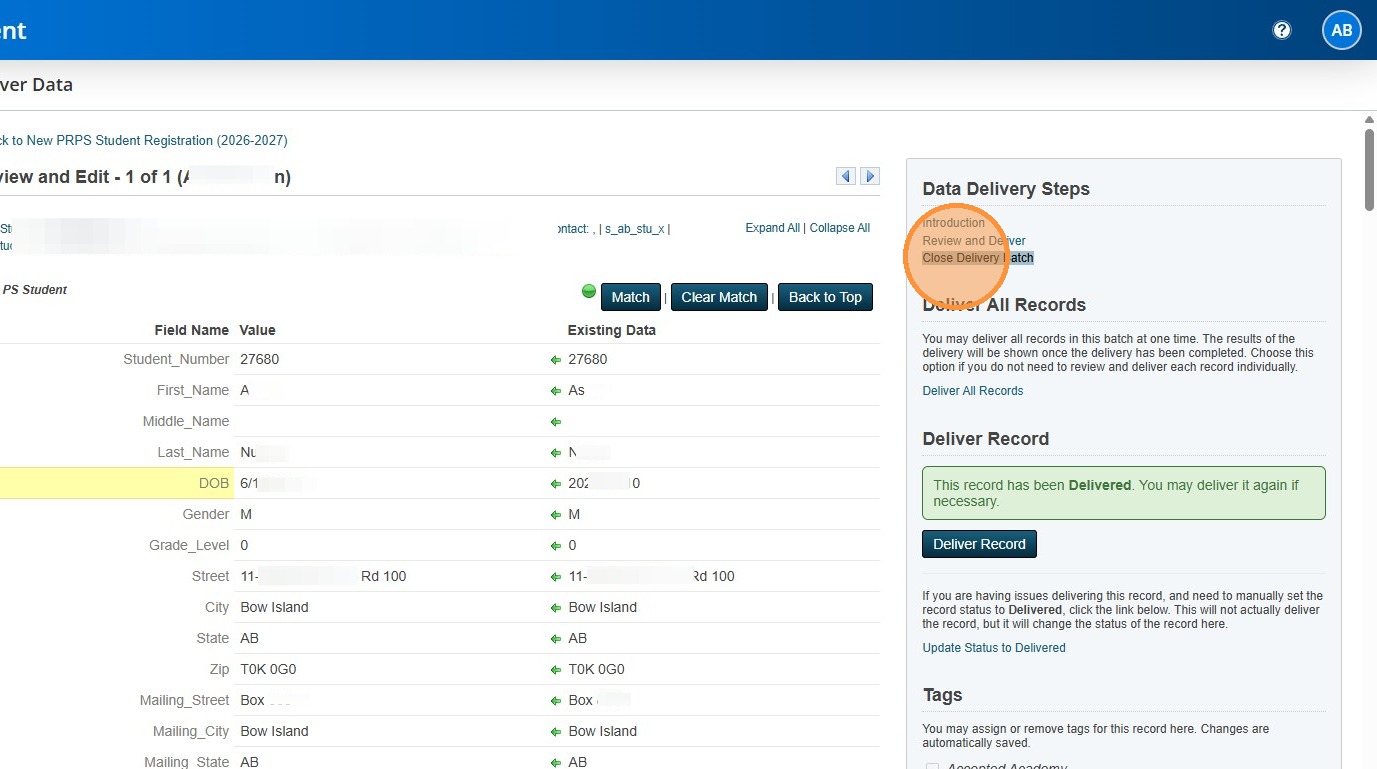
22. Once the delivery is done, you can "Close Delivery Batch". It will ask you to close a second time on the next screen. Make sure you follow it through.
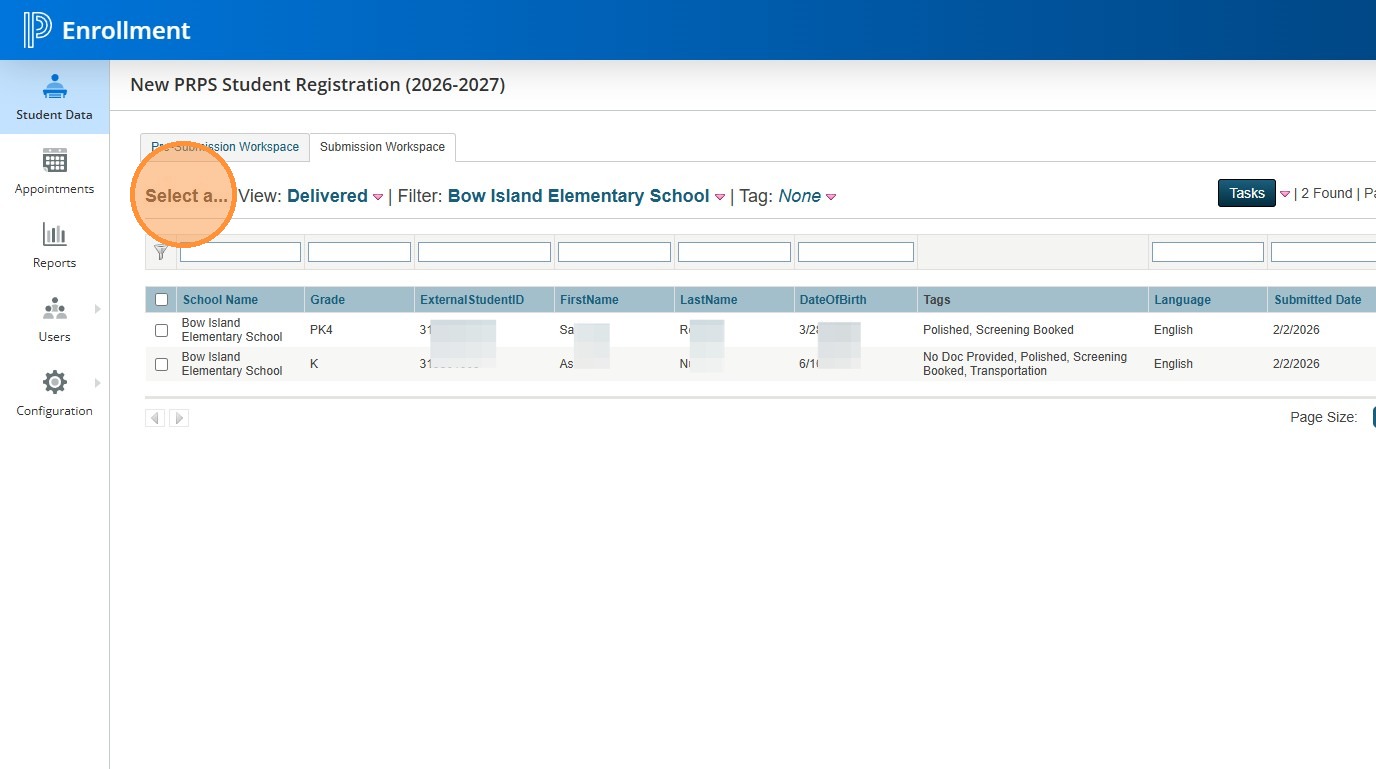
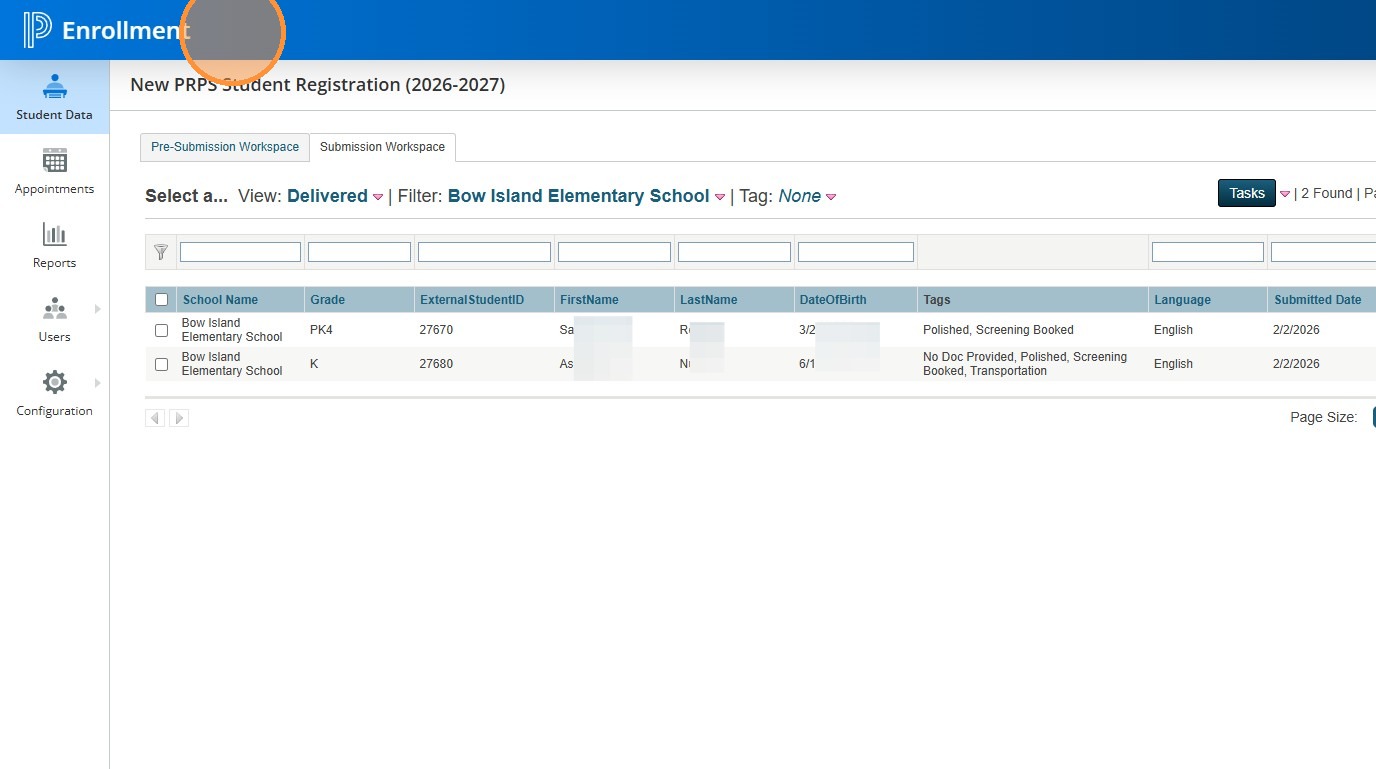
23. Once you close the batch, you will now find the student in the Delivered View. You aren't done yet.
Notice the ExternalID doesn't have an actual ASN number. It might if you successfully matched a student, however, this will not be the case for most new students. You need to add the ASN here so Krista can do the bulk reg doc uploads to PASI.
24. Go to SIS.
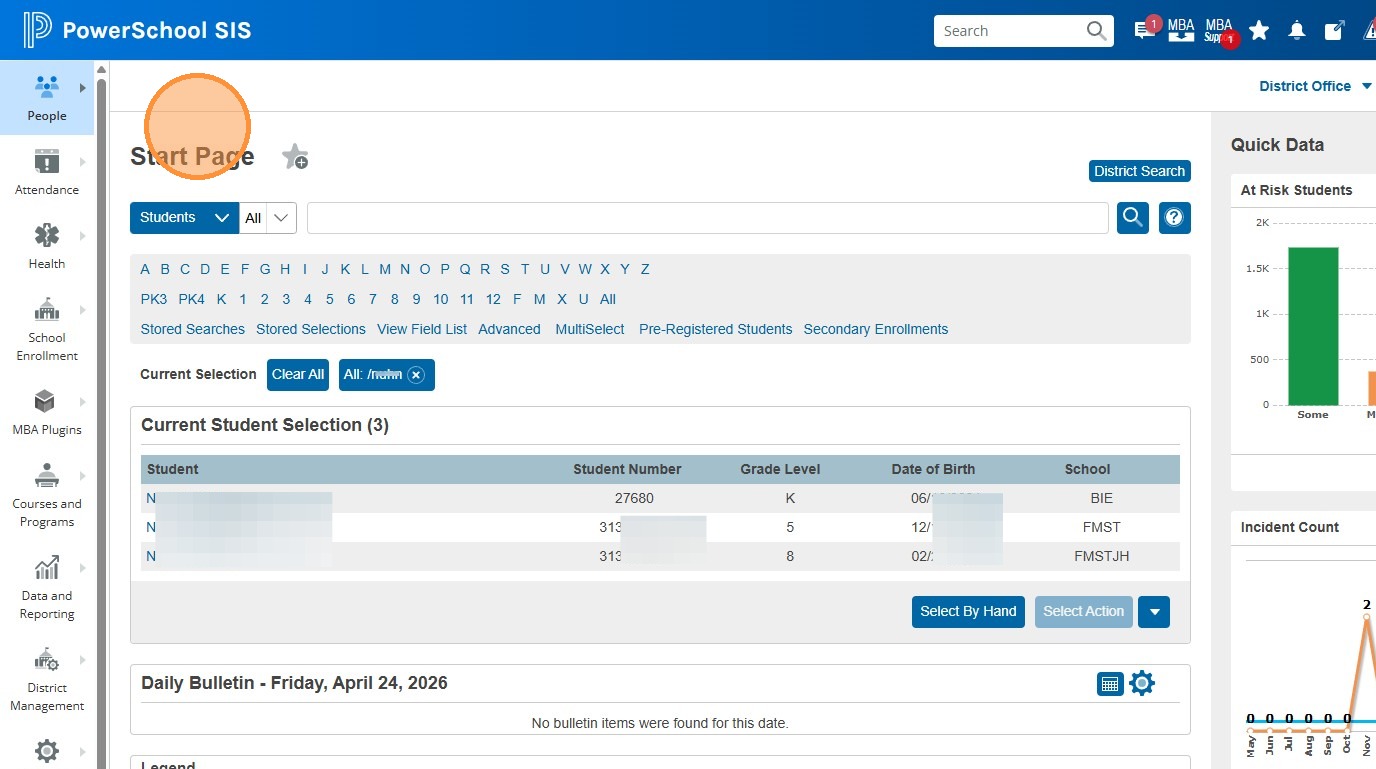
25. Find the student you just delivered.
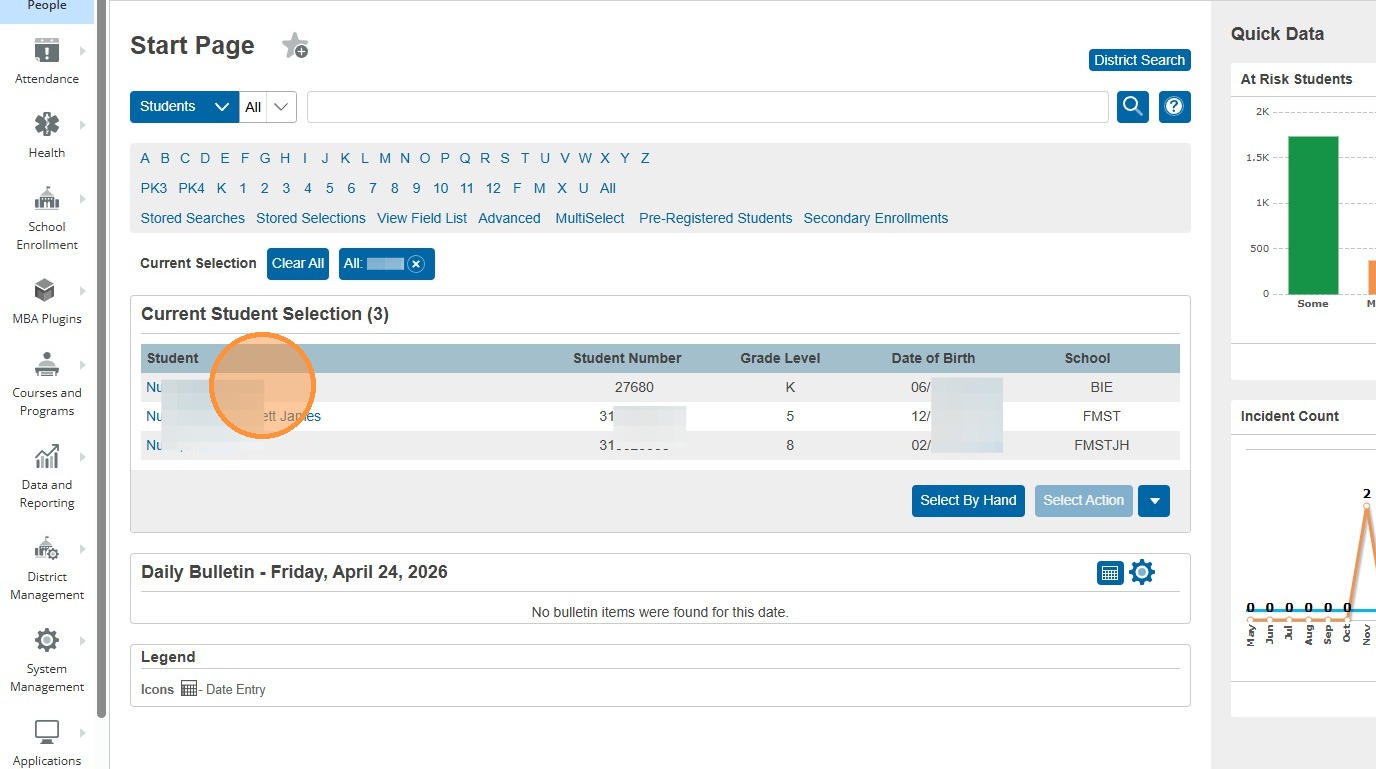
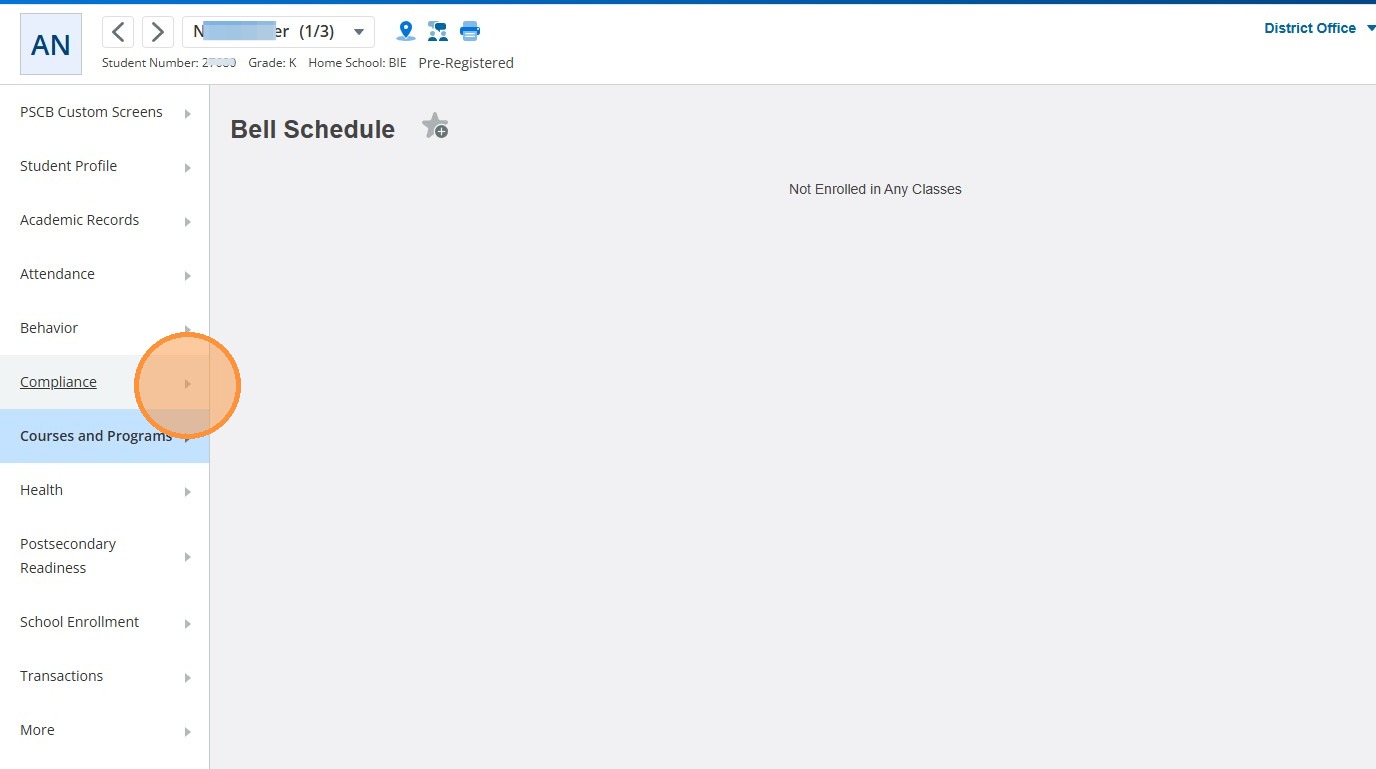
26. Click on the Compliance screen.
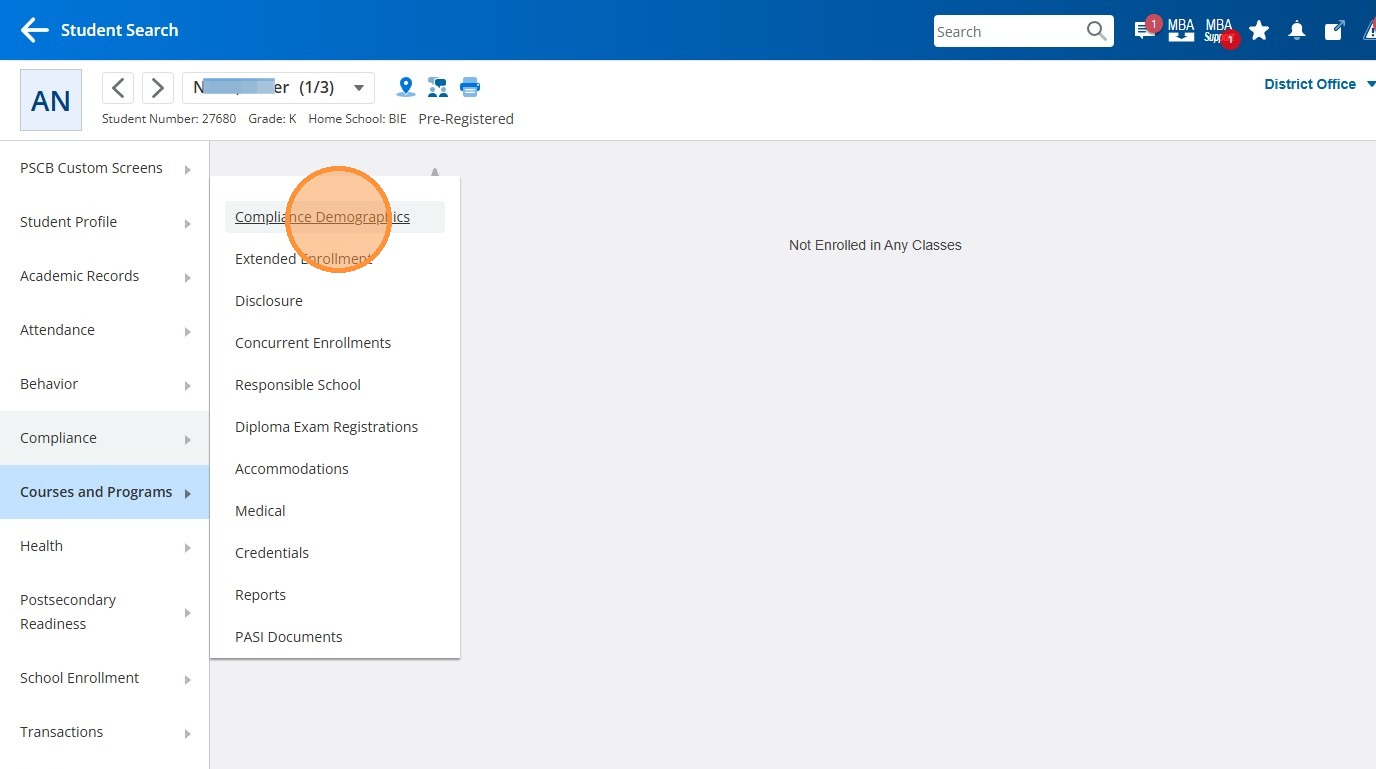
27. Click "Compliance Demographics"
28. Click "ASN Lookup"
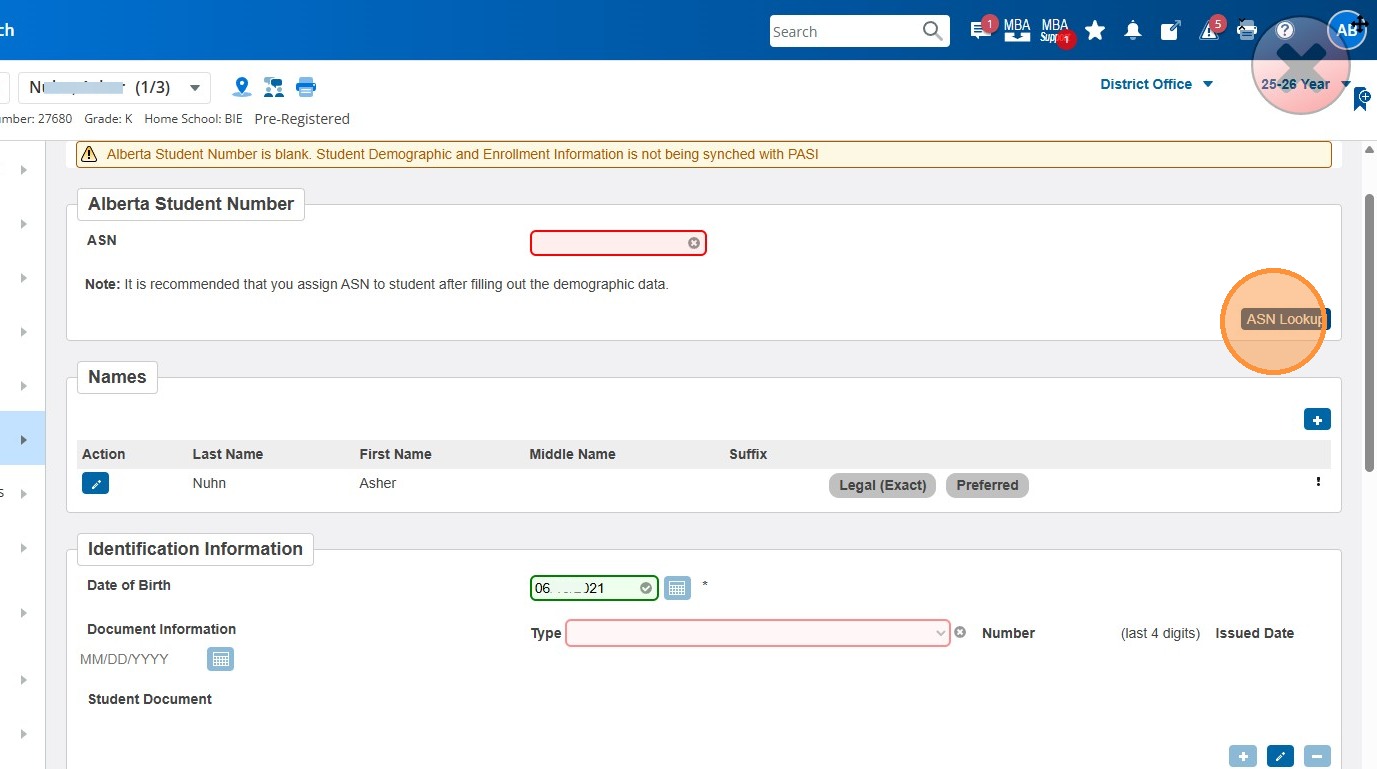
29. In this instance my new student was in PASI as they have previously enrolled with a different school division. Match the student.
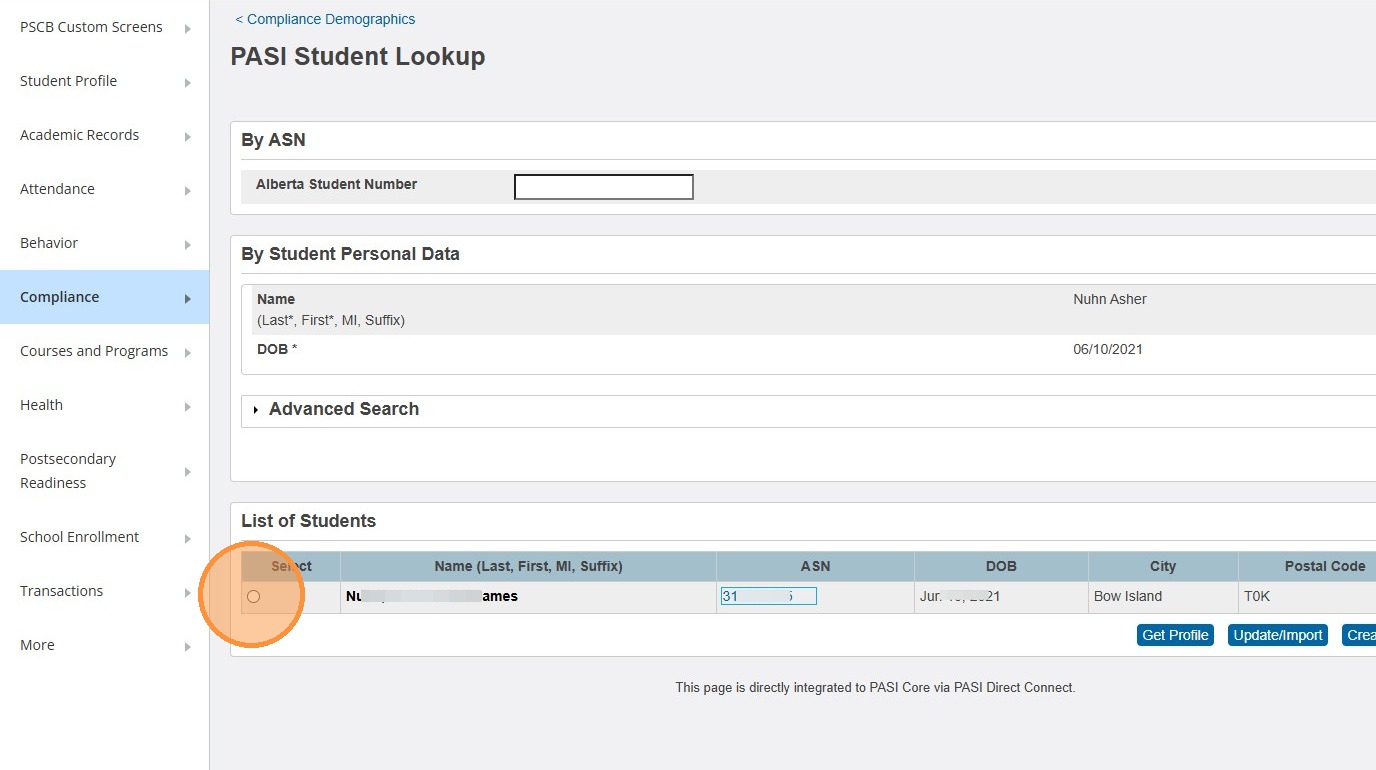
30. Click "Update/Import"
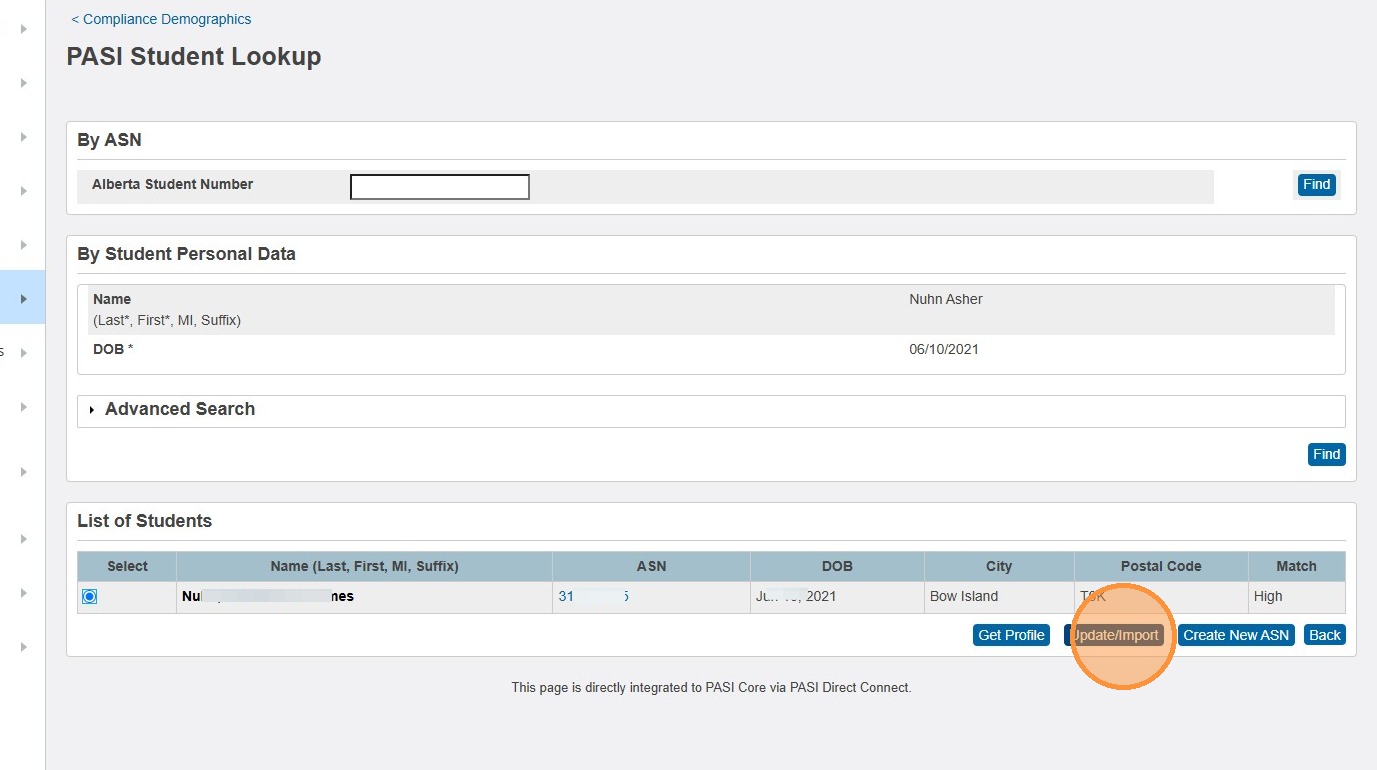
31. Confirm all the information on the page and click update.
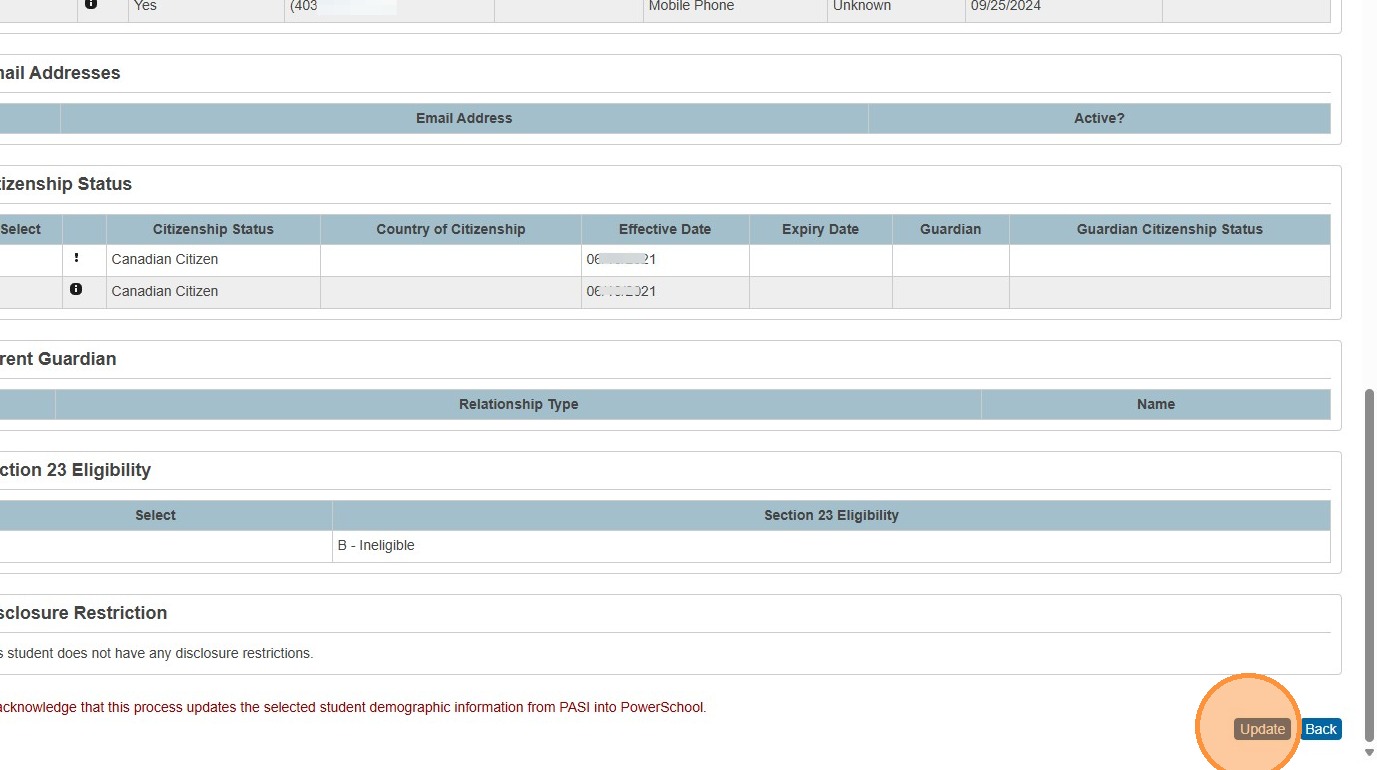
32. Copy the ASN you imported.
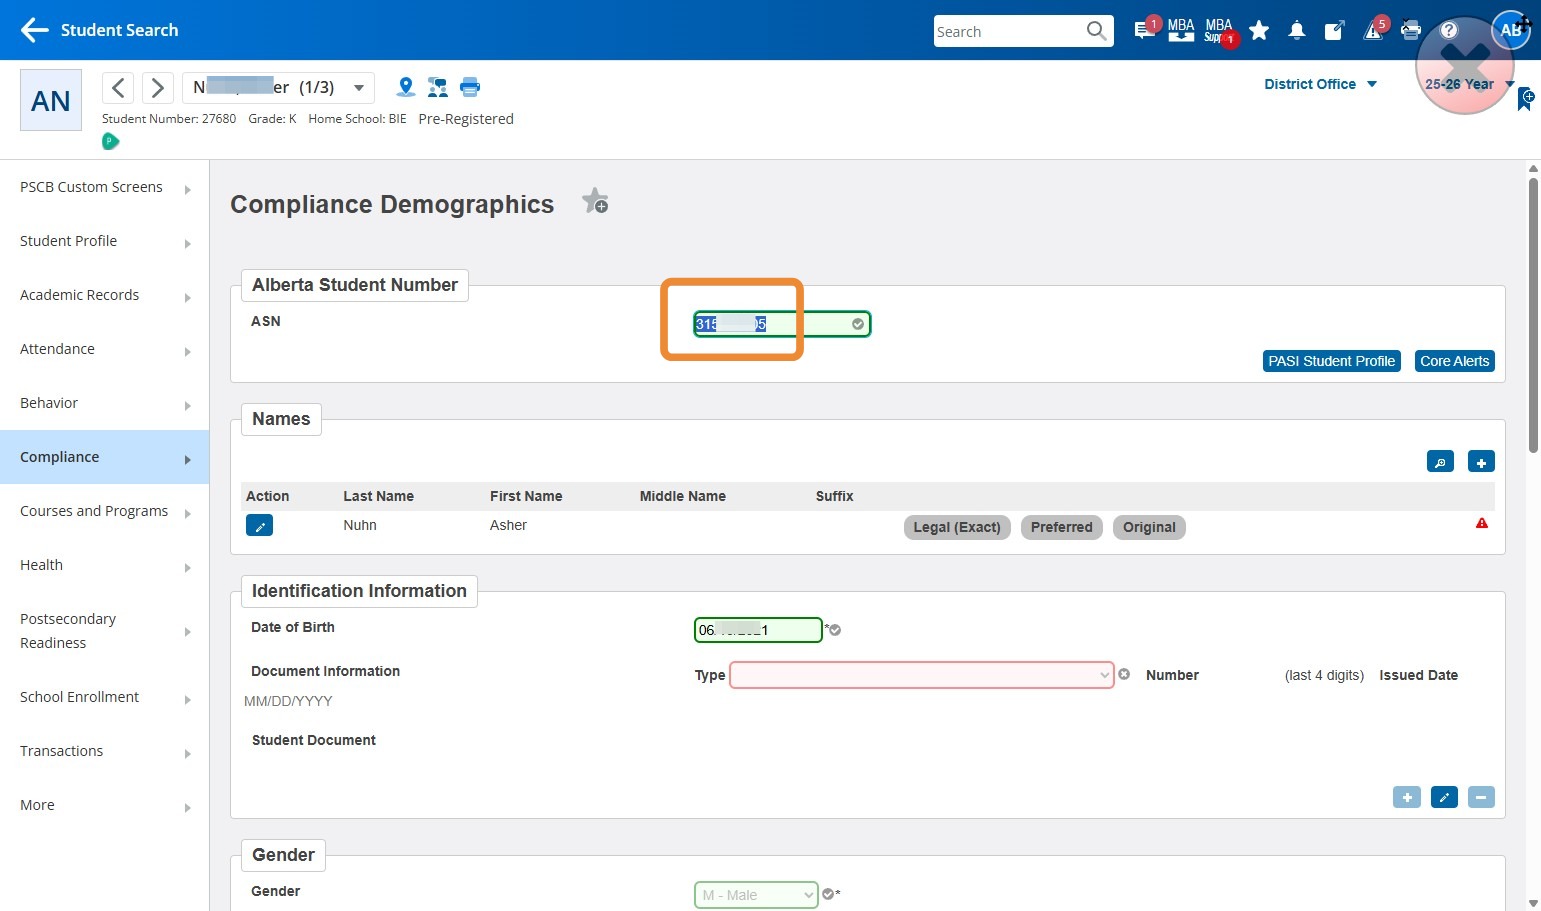
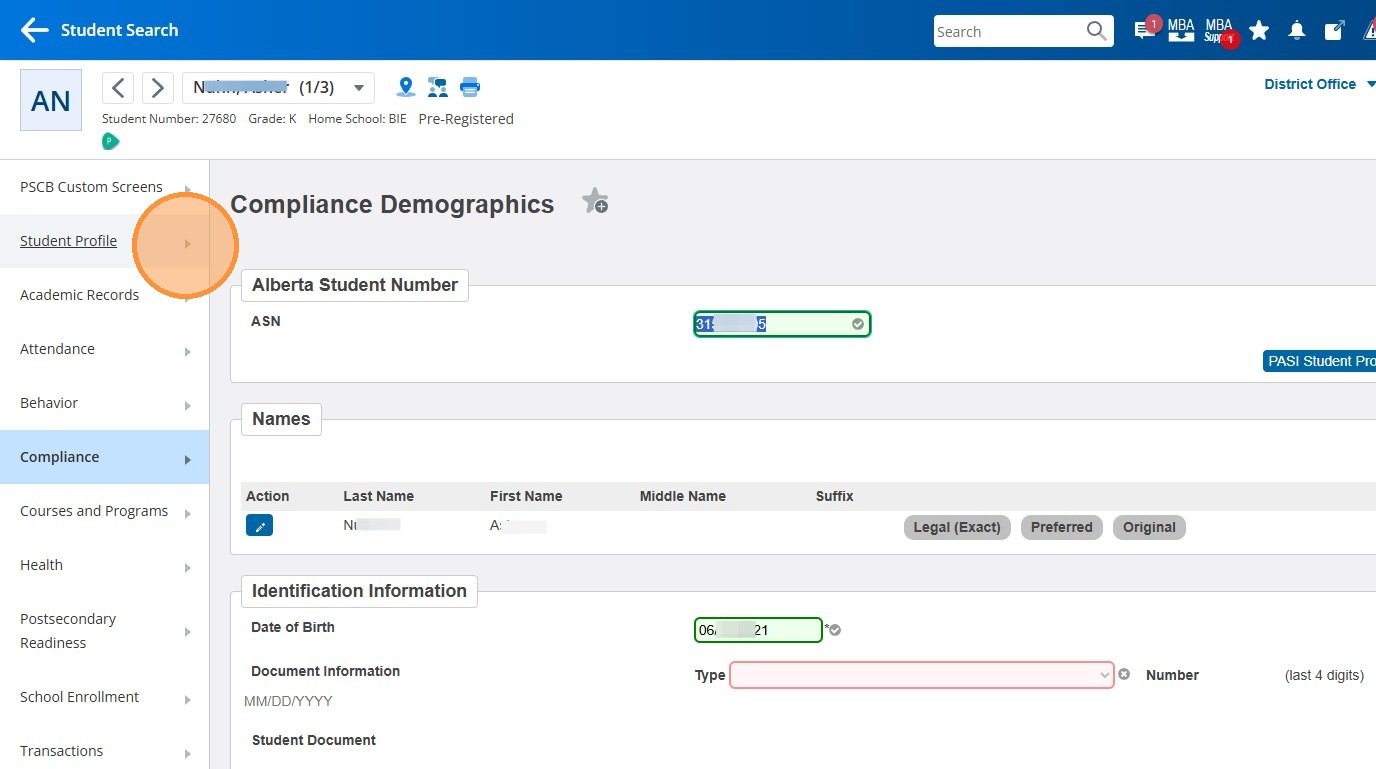
33. Click "Student Profile"
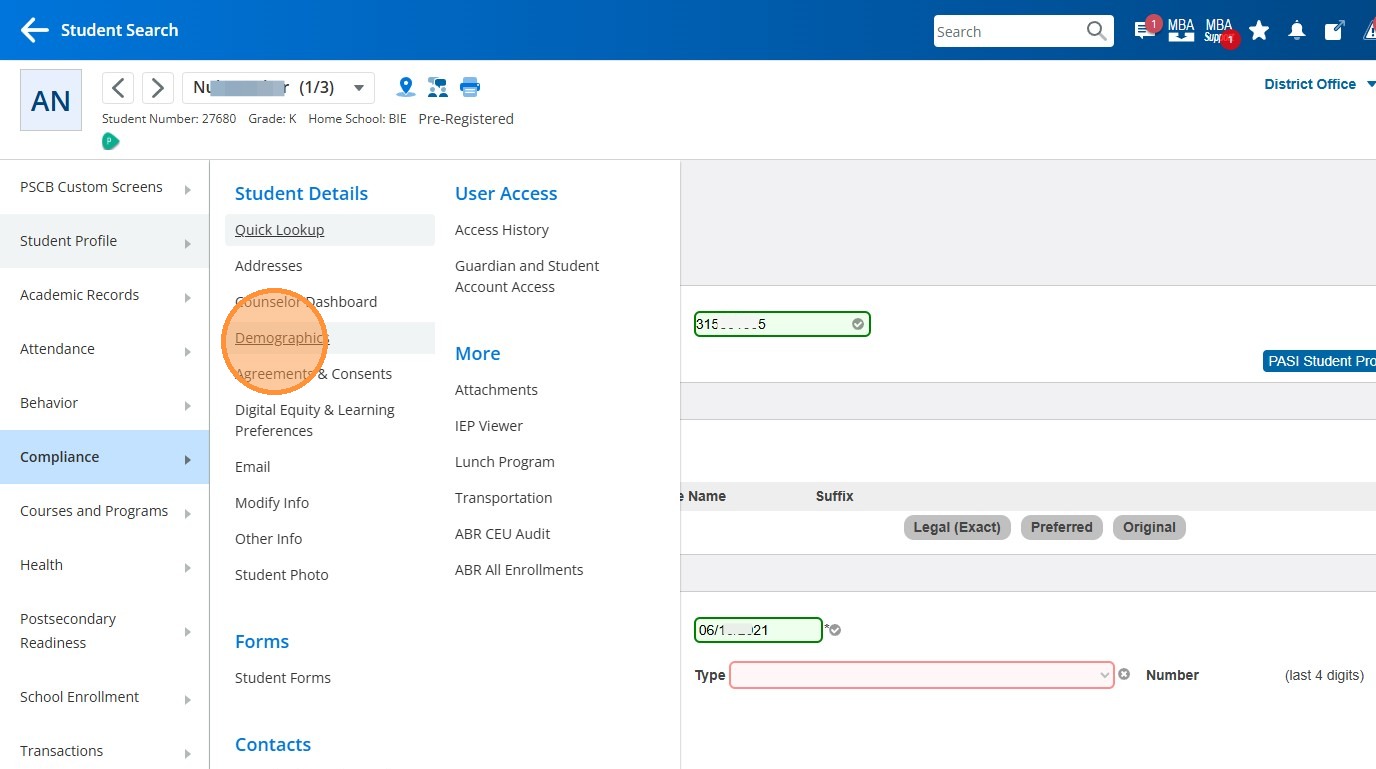
34. Click "Demographics"
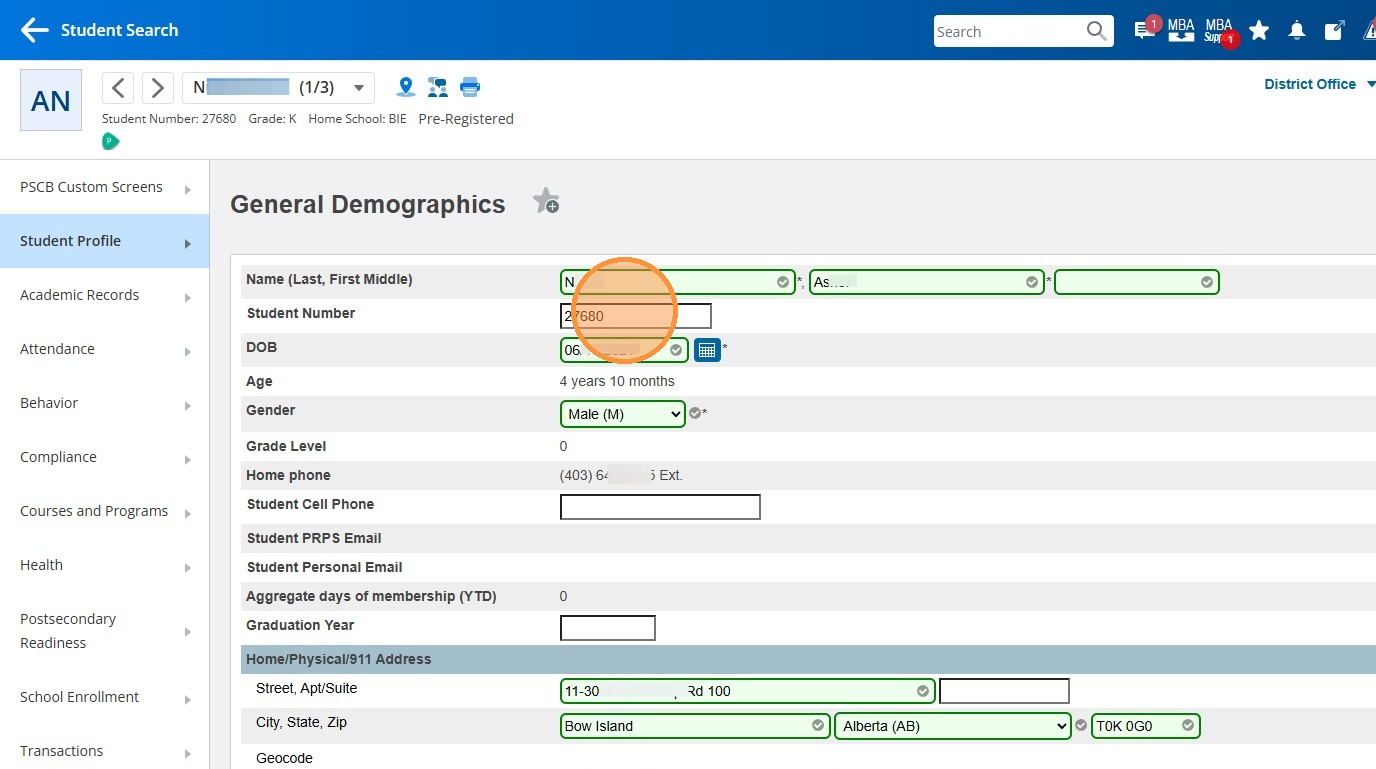
35. Paste the ASN into the Student Number field.
36. Click "Submit"
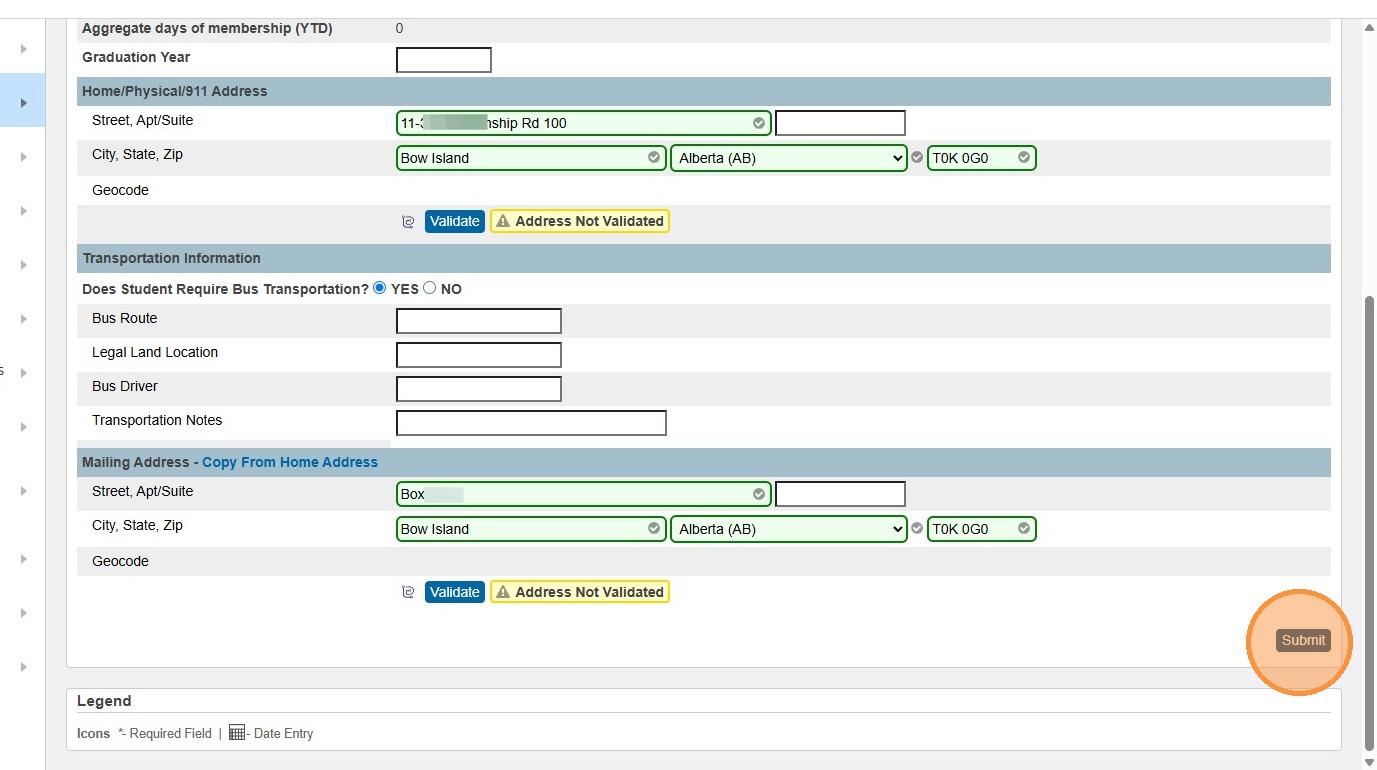
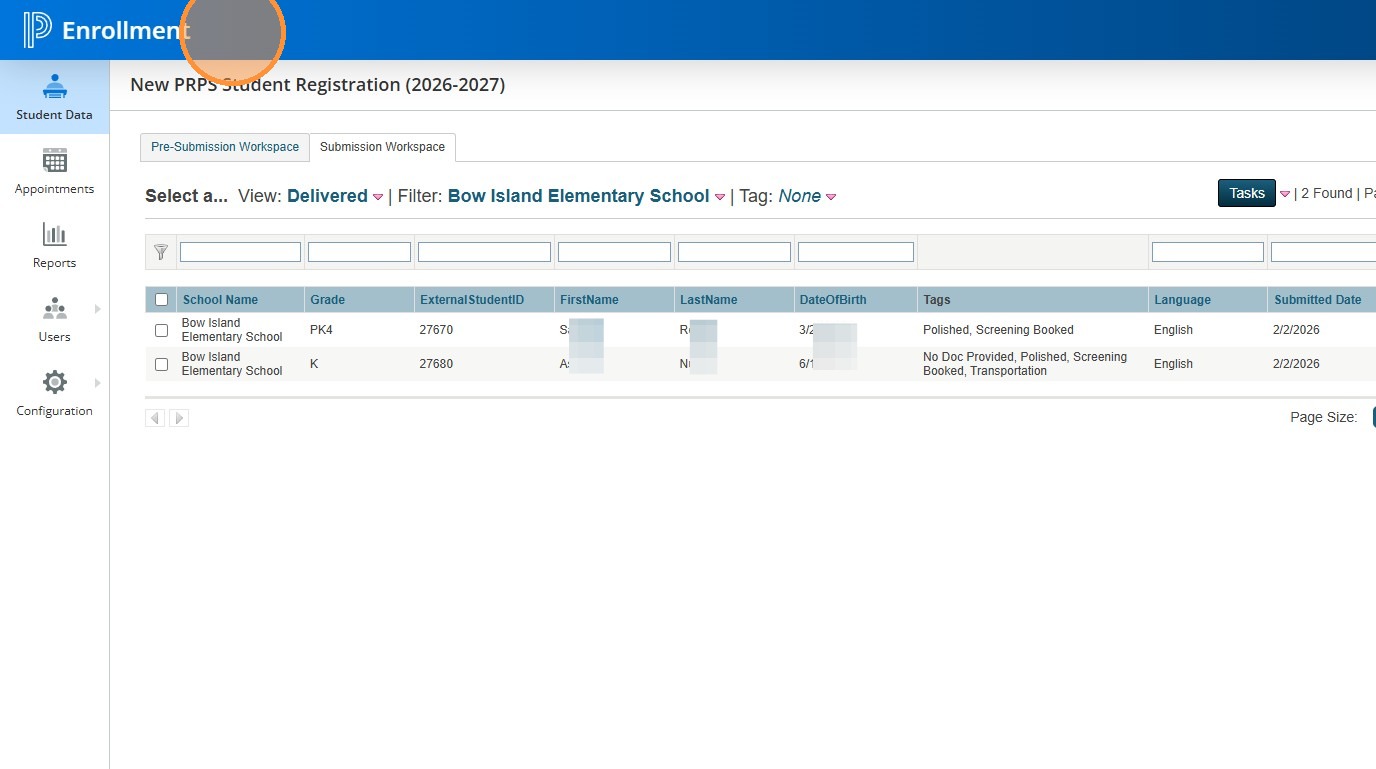
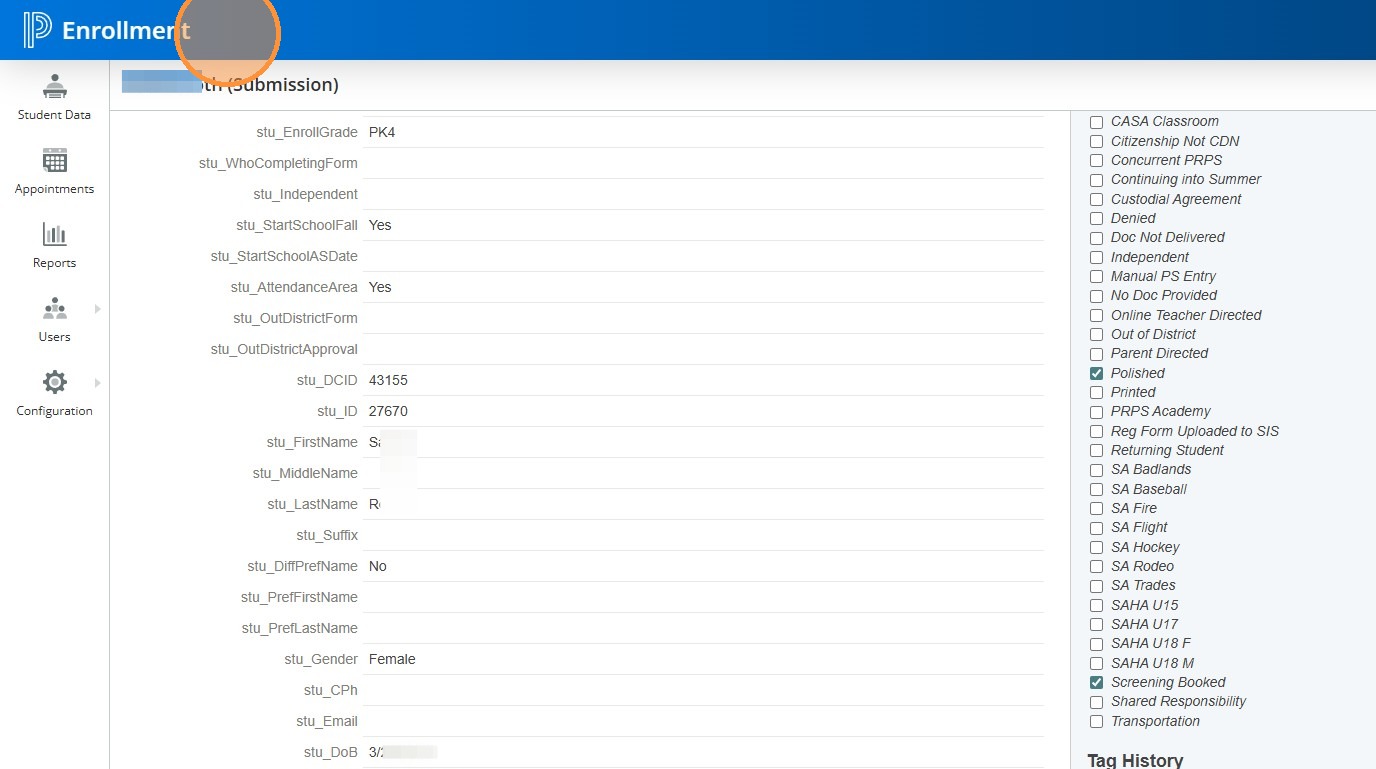
37. Now go back to your "Enrollment" screen.
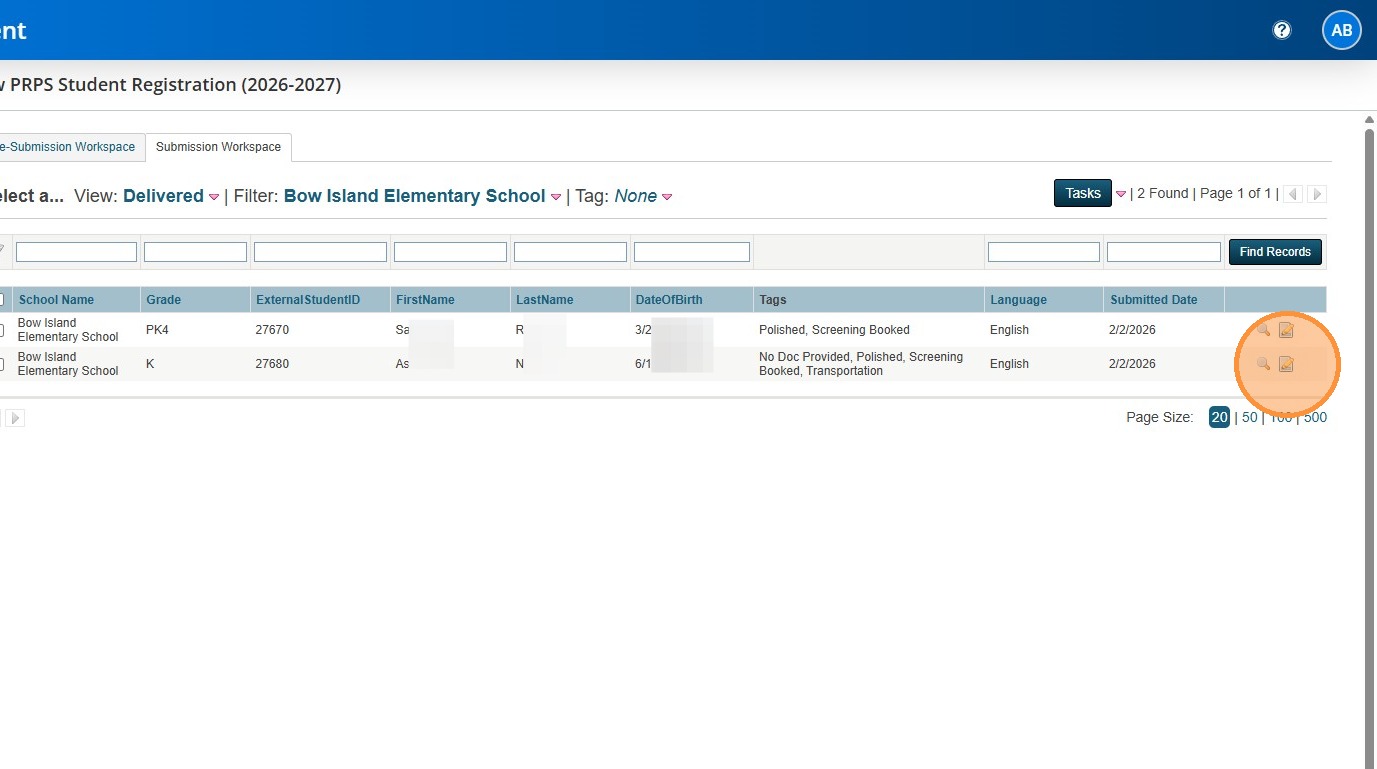
38. Click the notepad and pencil Edit button.
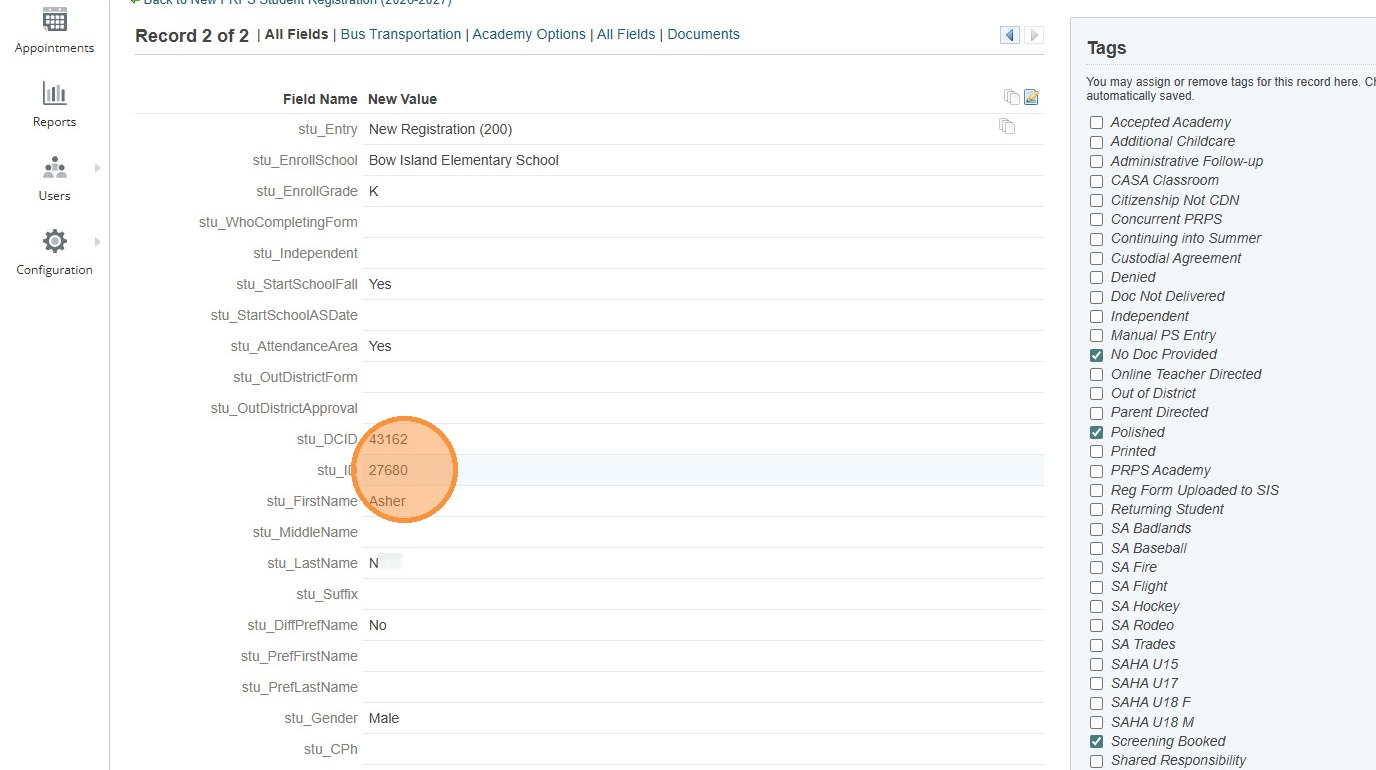
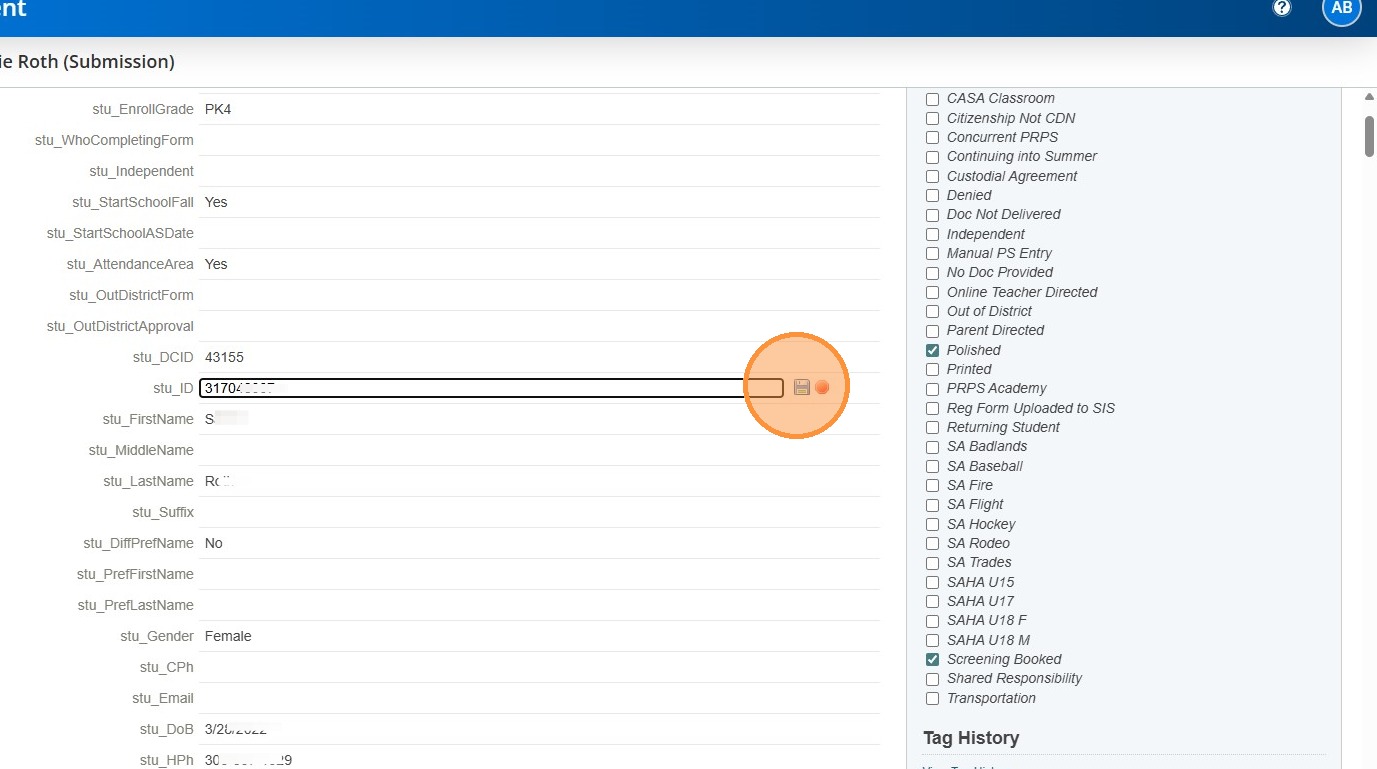
39. Find the field that says stu_ID.
40. Paste in the ASN.
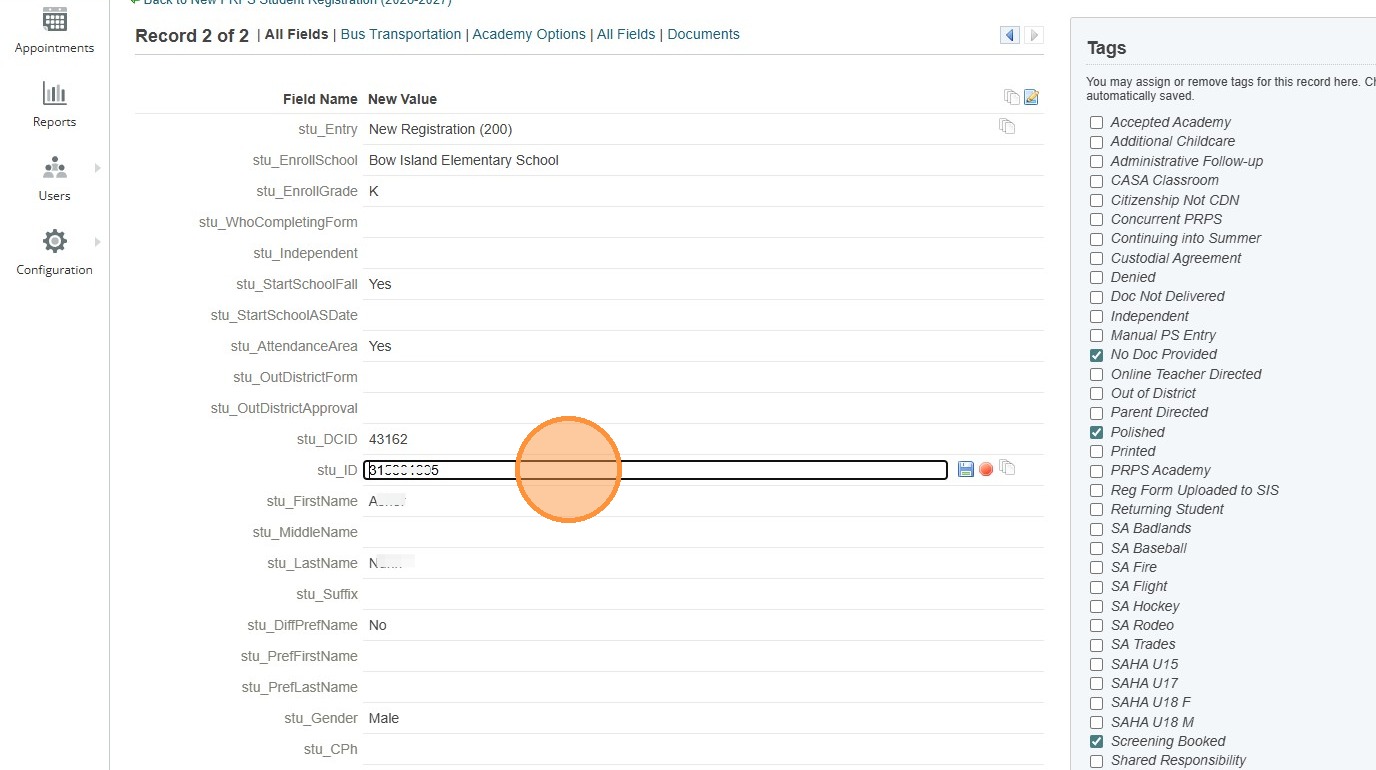
41. This is actually the end of the steps for adding a new student using PS Enrollment. However, when I was adding another student, an error came up when trying to pull in the ASN. The steps below show you how to work around that error if it happens to you.
42. When I tried to create a new ASN for a PreK student, I received the error code below.
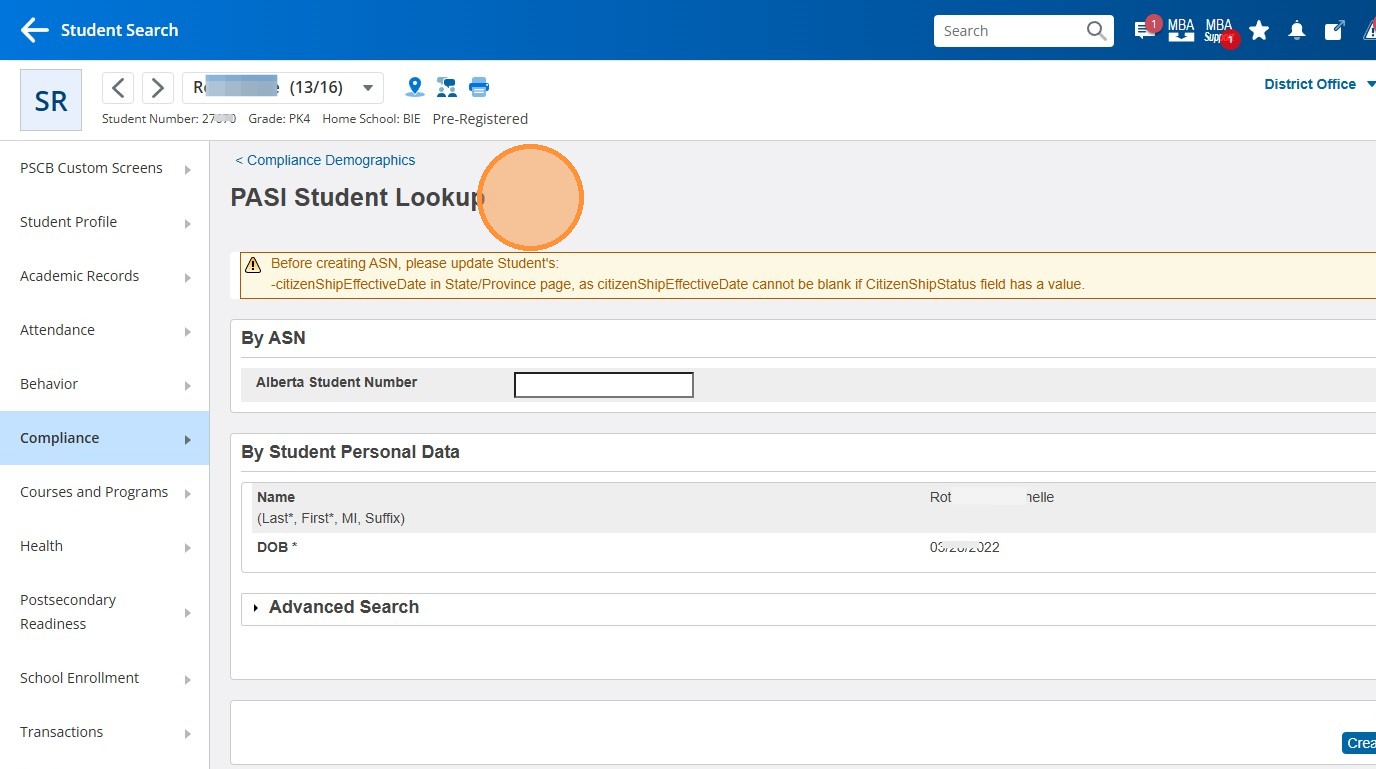
43. If this also happens to you, click back to the "< Compliance Demographics"page.
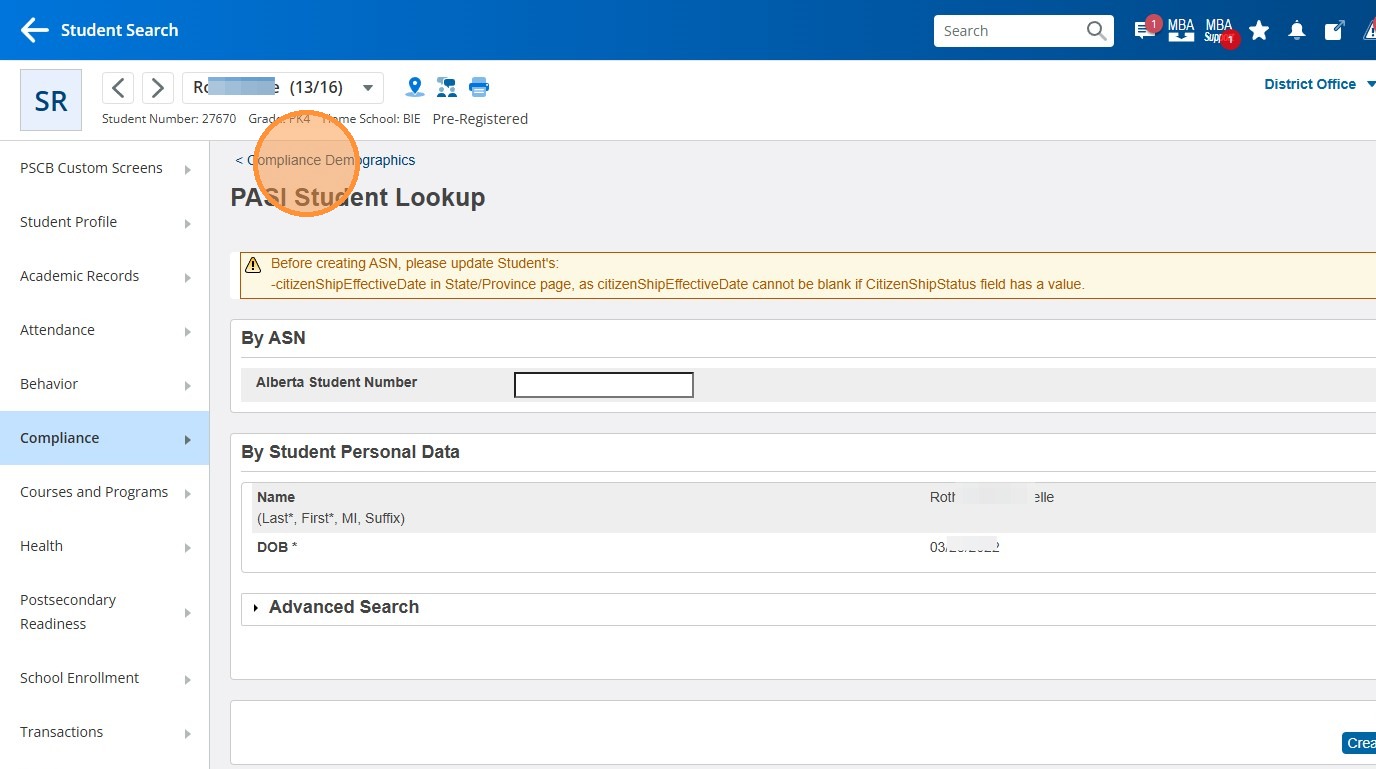
44. In this case, it was upset that I didn't have all the fields completed for the Citizenship Information. From just looking at it, it should be working.
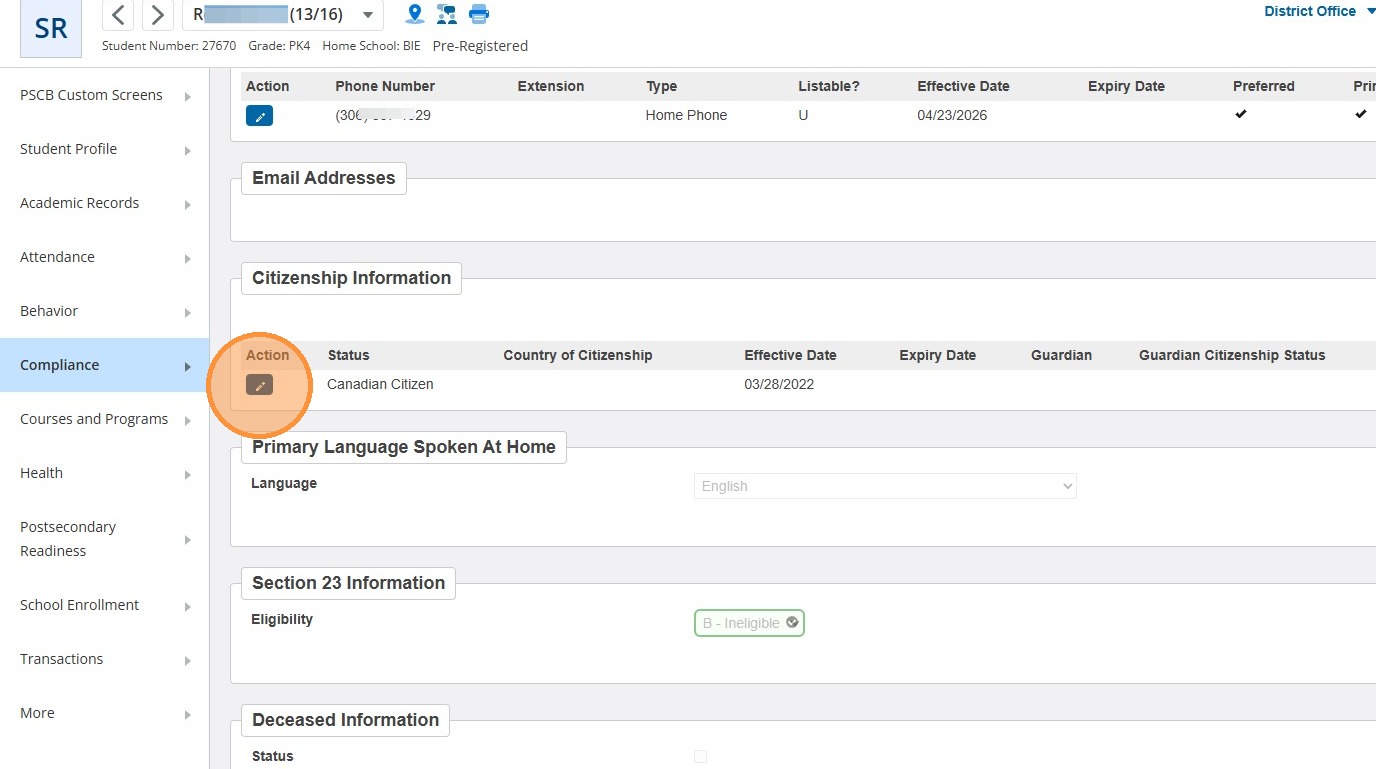
45. The first thing you can try is to edit the action and re-type the date. This could trick SIS into thinking you added a new piece of information. I tried that and attempted to create an ASN again. It still didn't work.
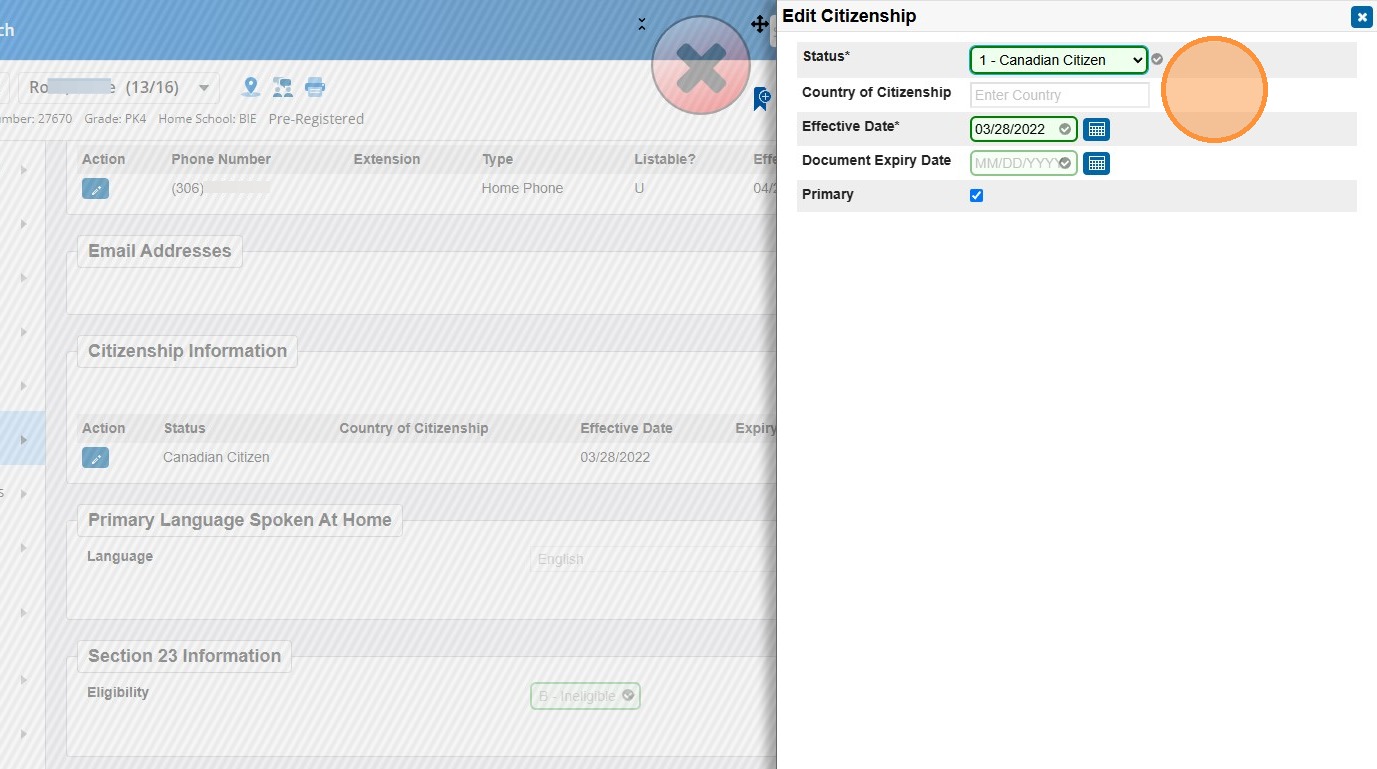
46. The next thing you can do is delete the Citizenship information using the delete option in SIS. If it is a PreK student, you will have to add it back in manually after you link the ASN. If it is an older student who will be syncing to PASI, chances are the information will import in when you link the ASN on the import screen. If it doesn't (which would happen if the student is new to PASI) you will have to add it back in manually after you create an ASN - So, make sure you write down what is in the fields before you delete it.
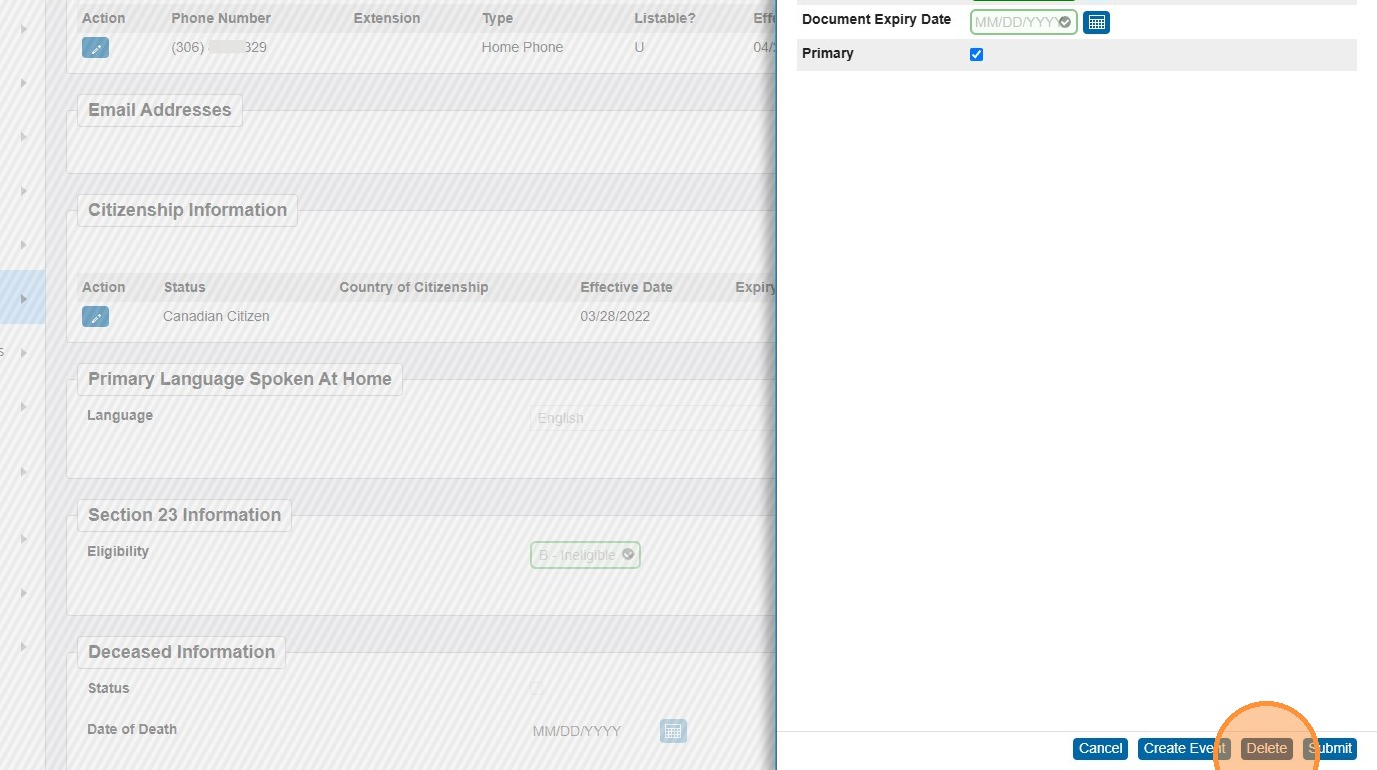
47. Now try it again.
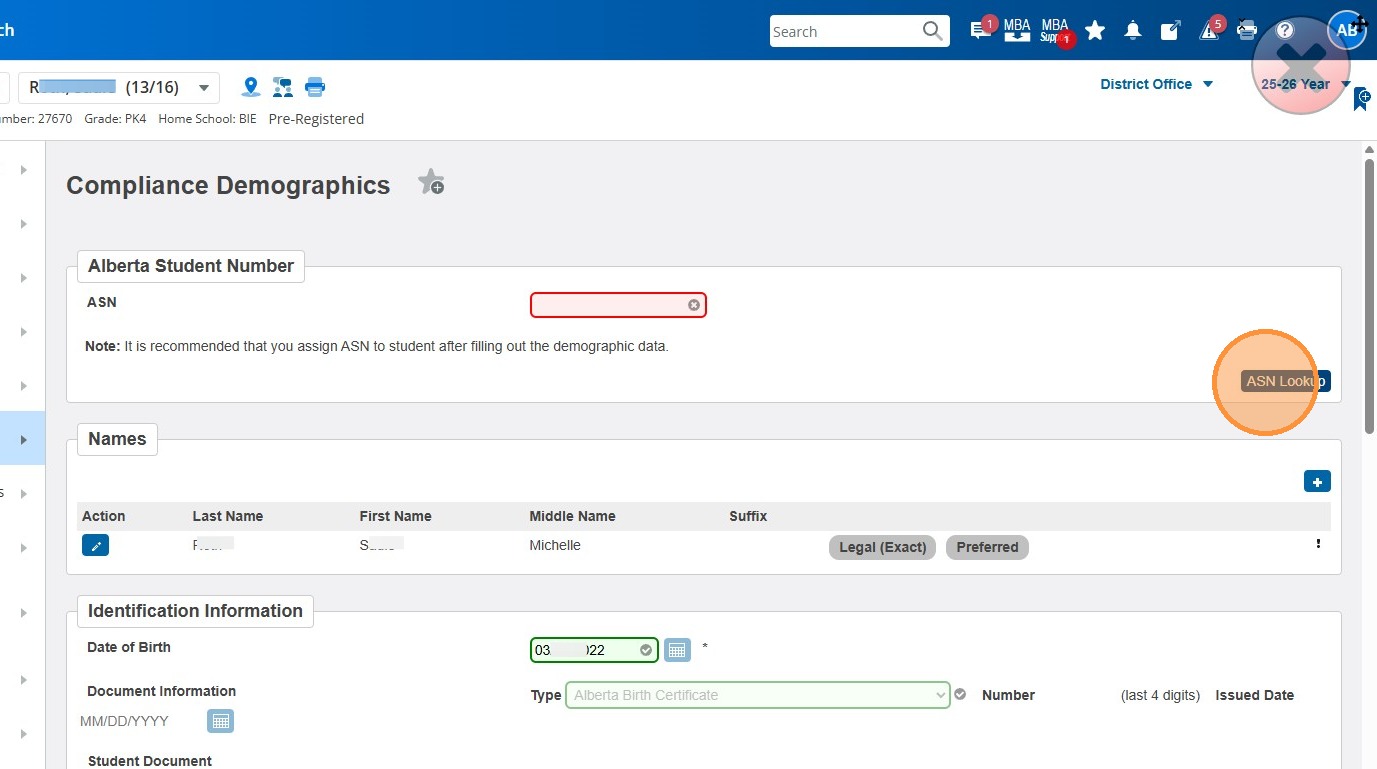
48. This time it worked. Click "Create New ASN" or "Update/Import" (it will depend on age of student and if they are new to PASI)
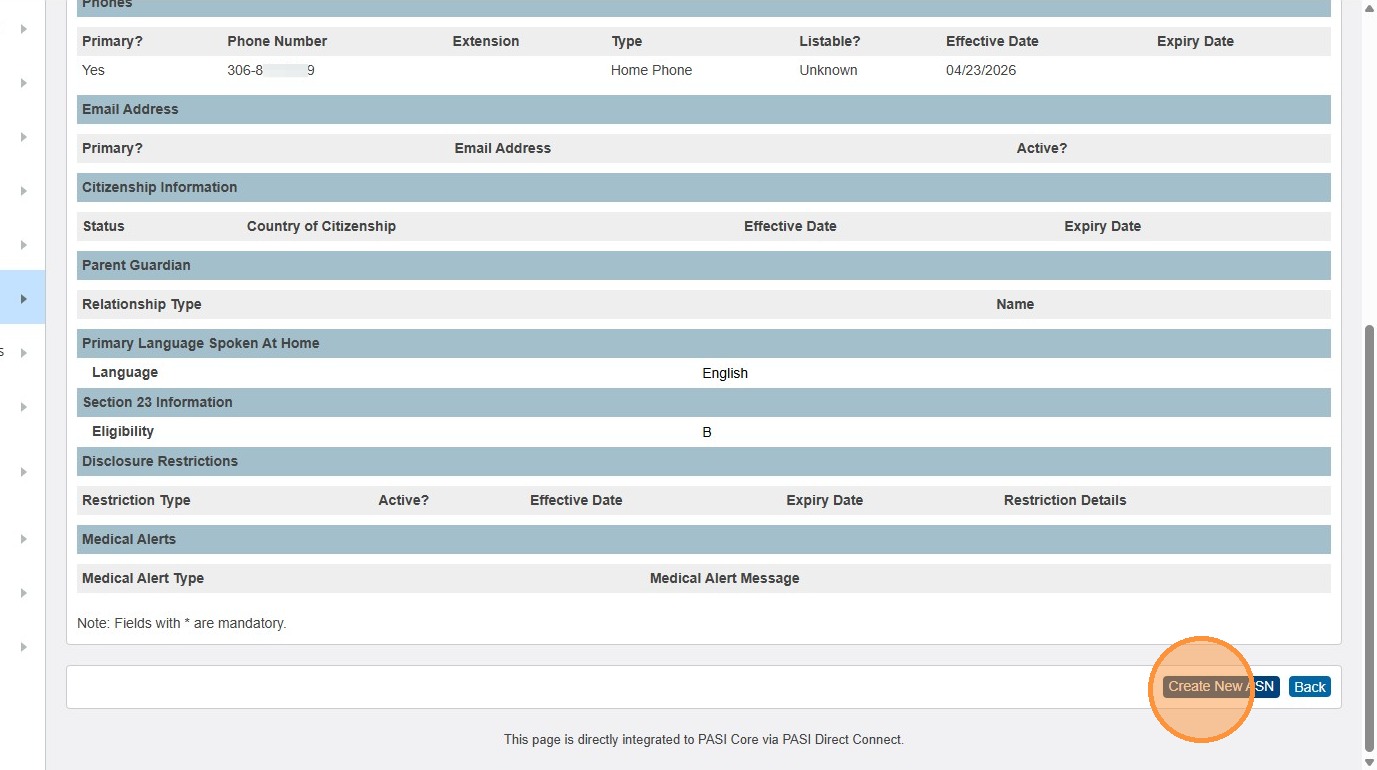
49. Click the newly created ASN and highlight. Copy the ASN.
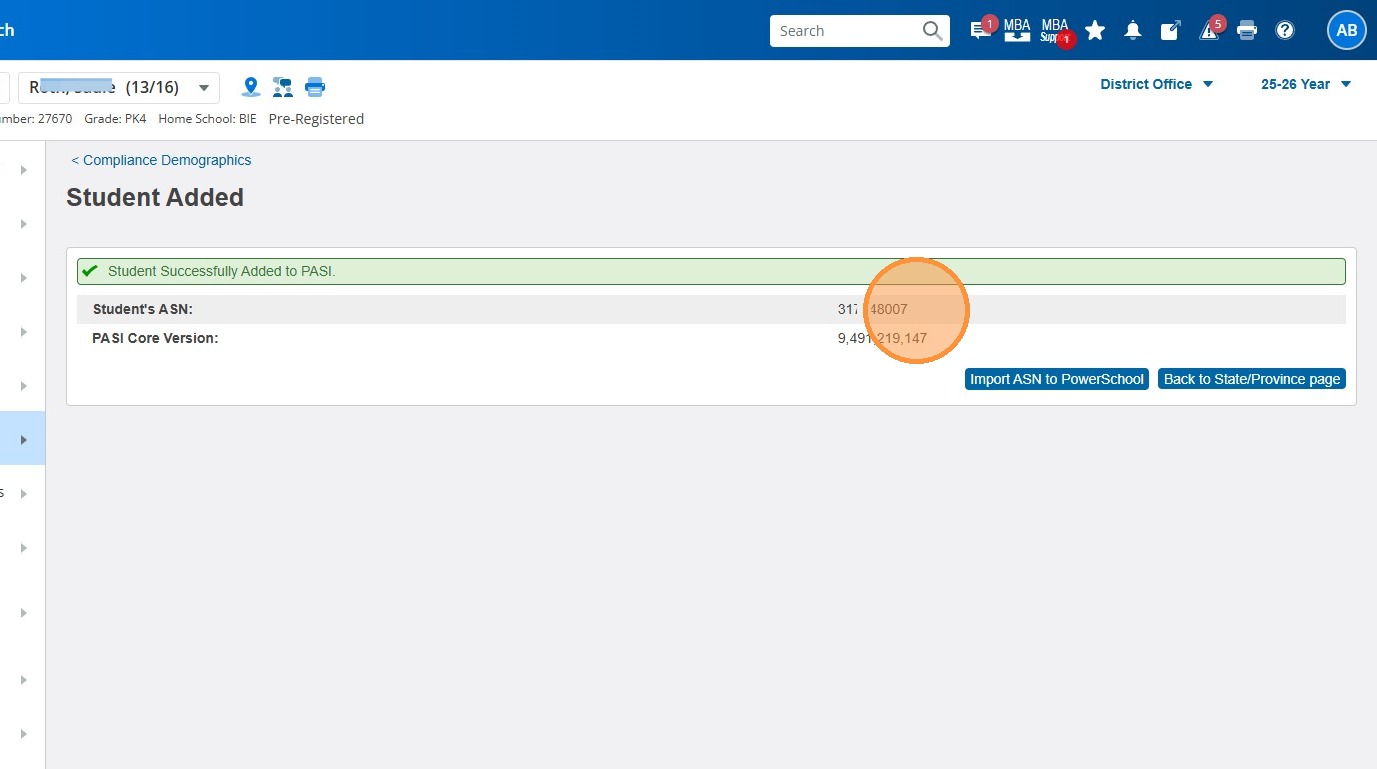
50. Click "Student Profile".
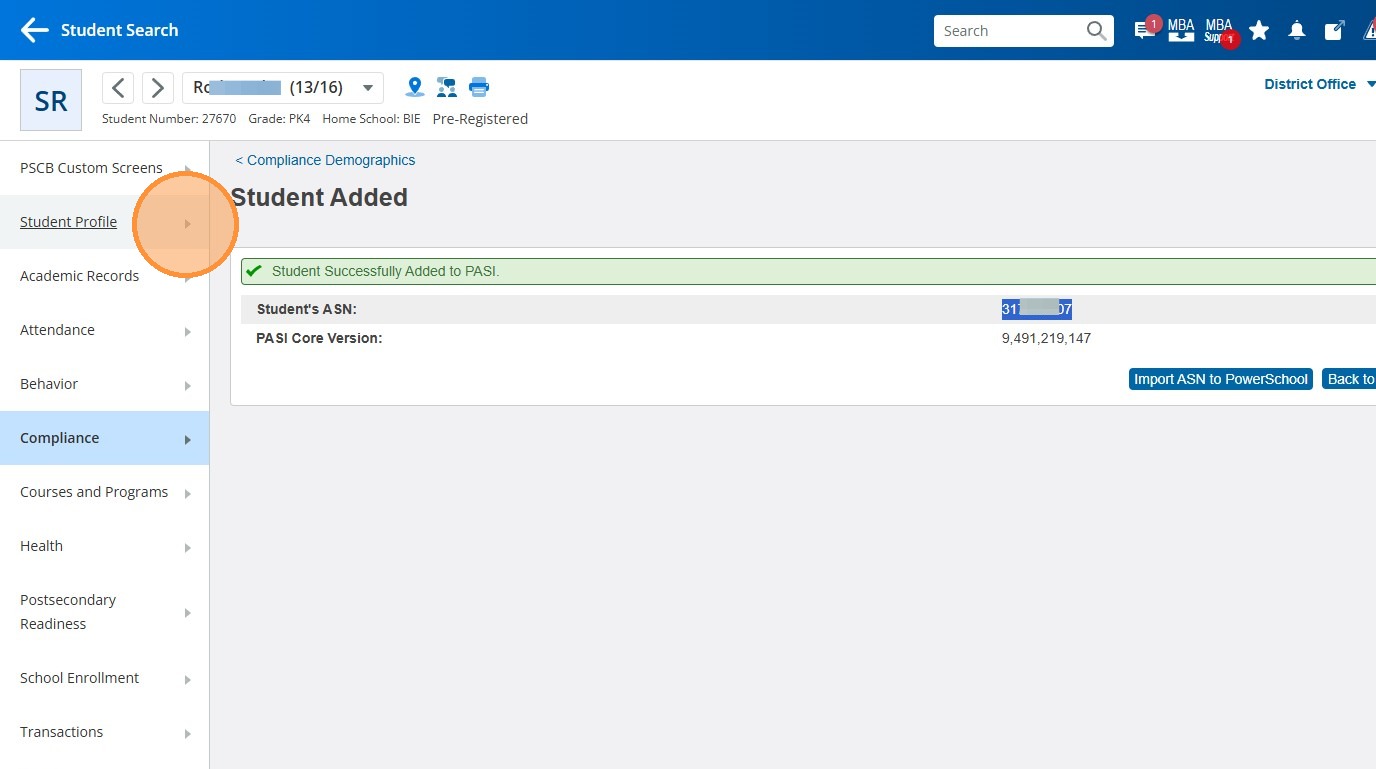
51. Click "Demographics"
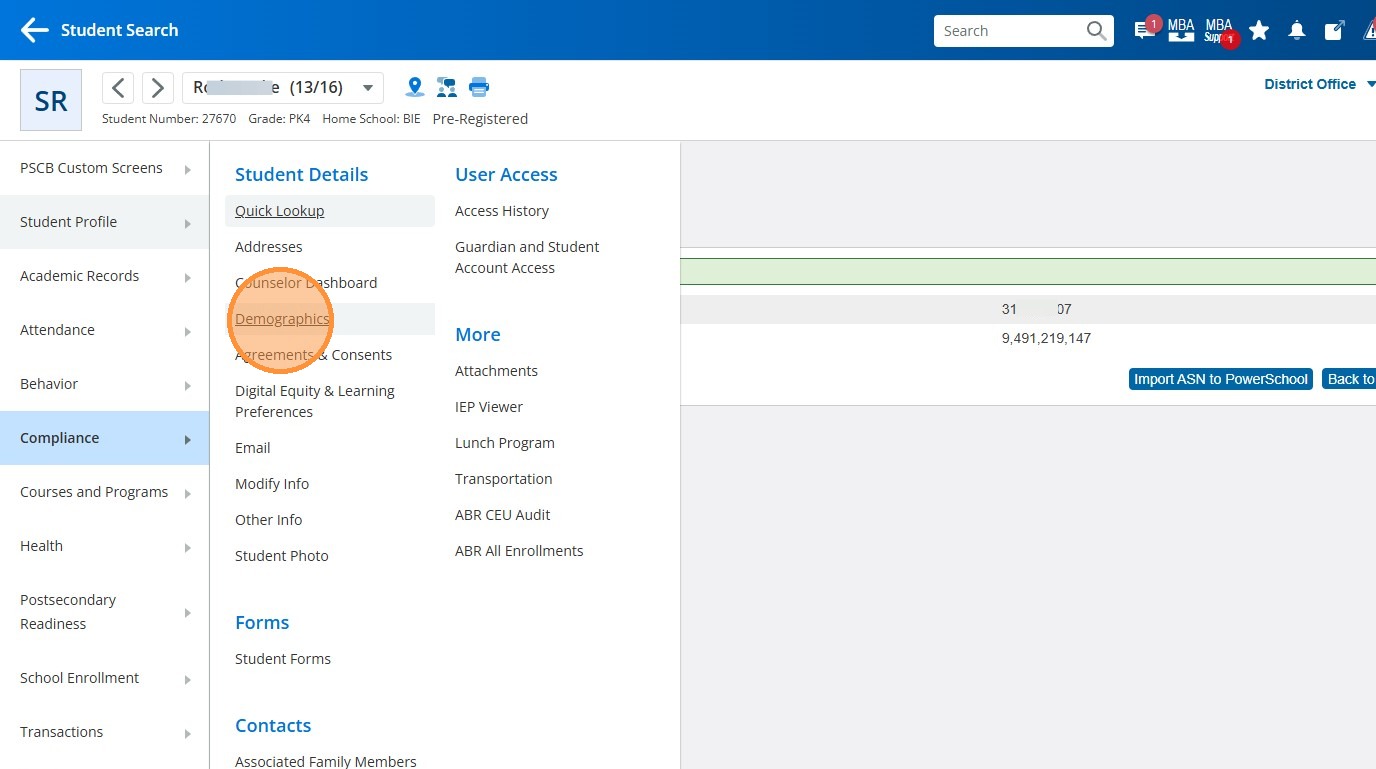
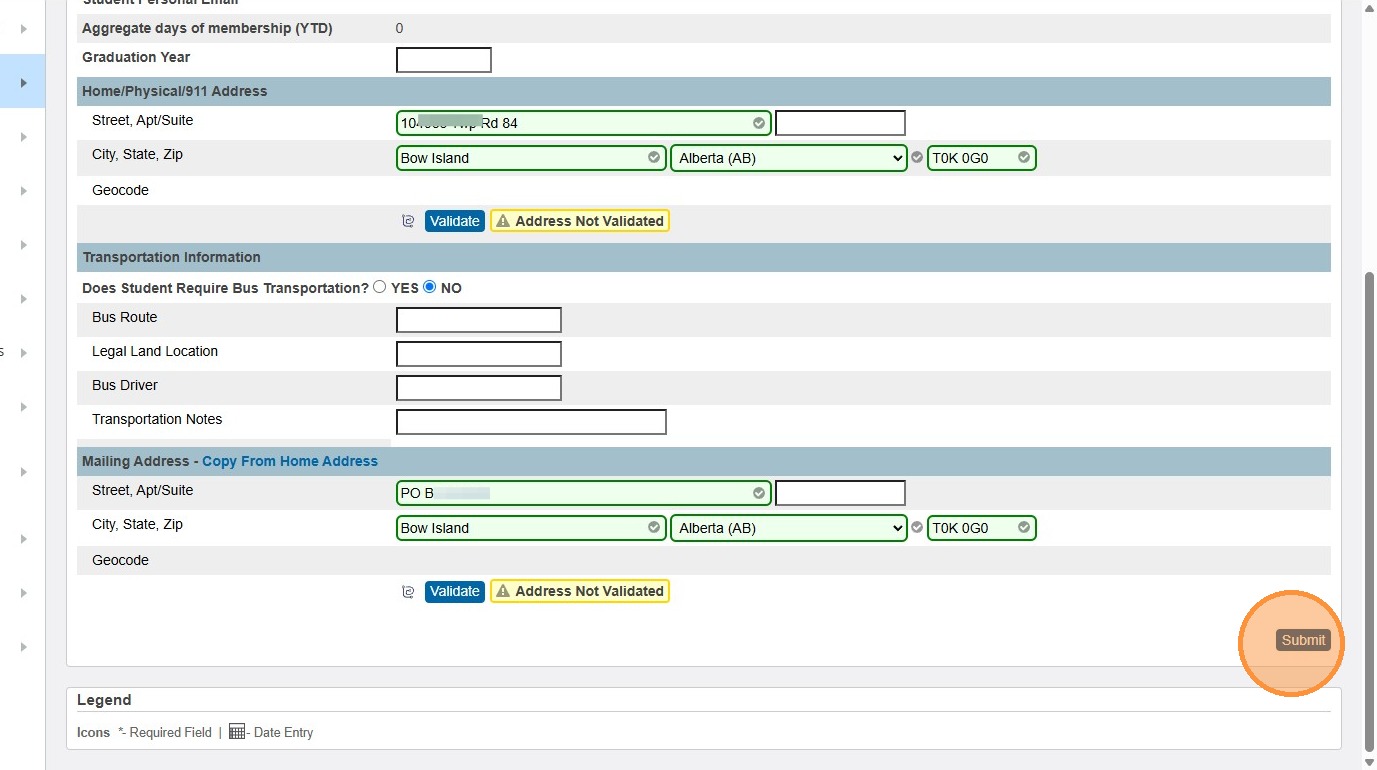
52. Paste the ASN in the Student Number field.
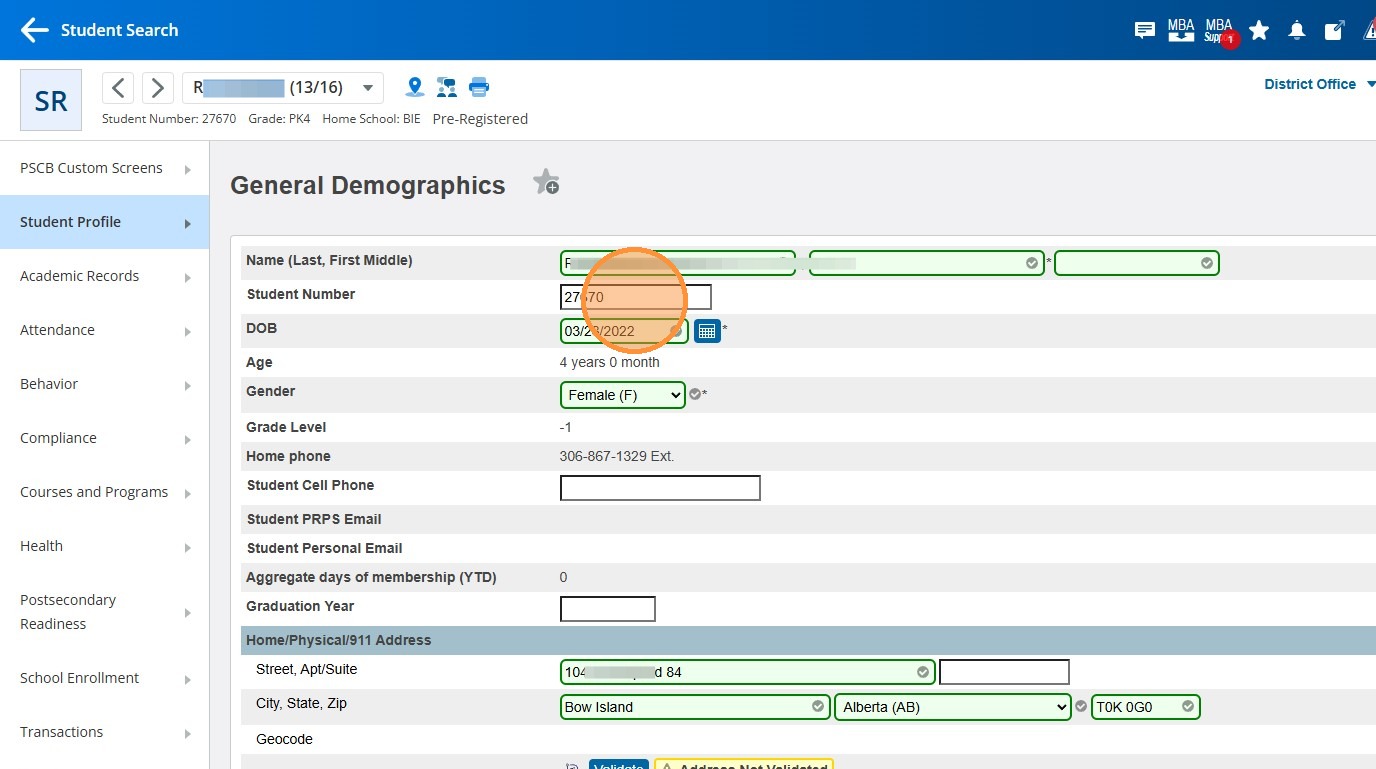
53. Click "Submit"
54. Go back to PS Enrollment again and add the new ASN you made to stu_ID.
55. Click Save.
56. You can close the record and return to the Delivered screen in PS Enrollment. Now you will see your new ASN linked to the student. The document is now ready for bulk PASI upload that Krista will do for you.